...
| Info |
|---|
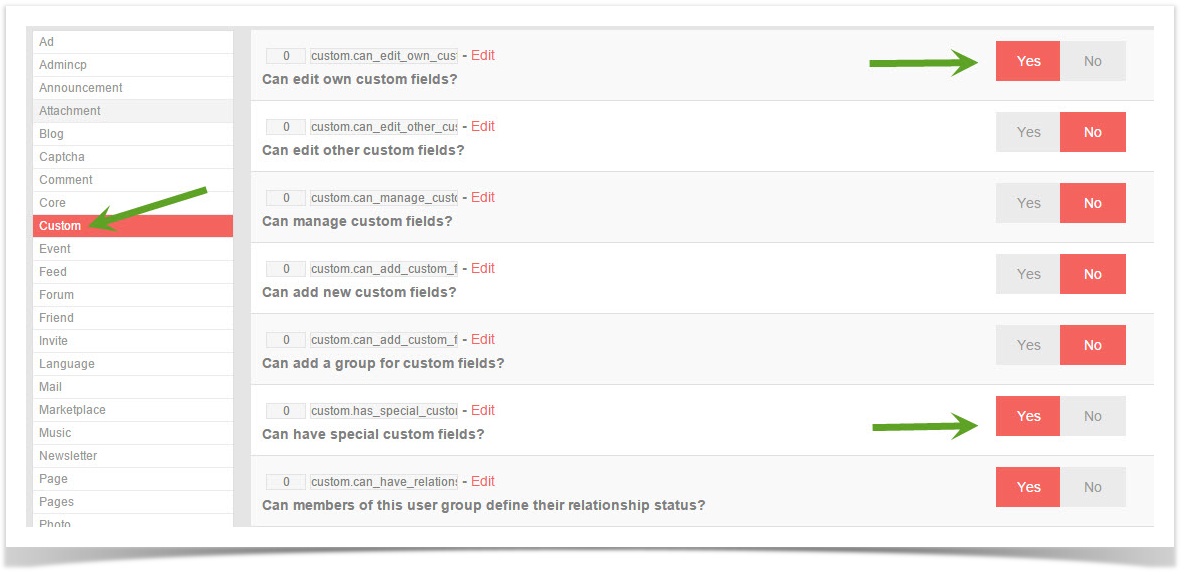
Before creating a Custom Group, you need to be sure you have set your user group settings to allow them to use Custom Fields.
|
Creating
...
User Group
...
- Click Custom Fields
- Click Create A Custom Field
- Click Create a new Group
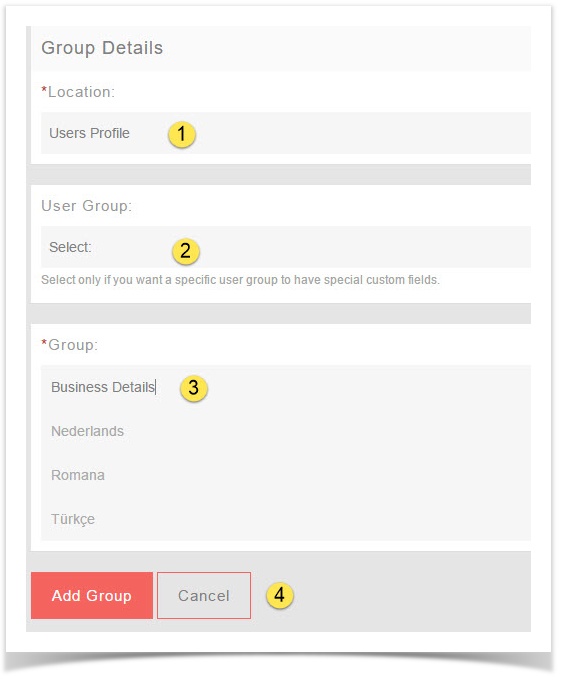
- Fill in the form and choose a user group that this is for. You can only select one user group for this.
- Location: User's Profile
- User Group: The one you're making this for.
- Name: Put a name for this group. If you have other languages installed, be sure to put the name in those too. In our example, we put this one as Business Details.
- Add Group or Cancel: Click to Add when done or Cancel if you don't want to add it.
Creating User Group specific custom fields
- Click Custom Fields
Anchor custom1 custom1
...
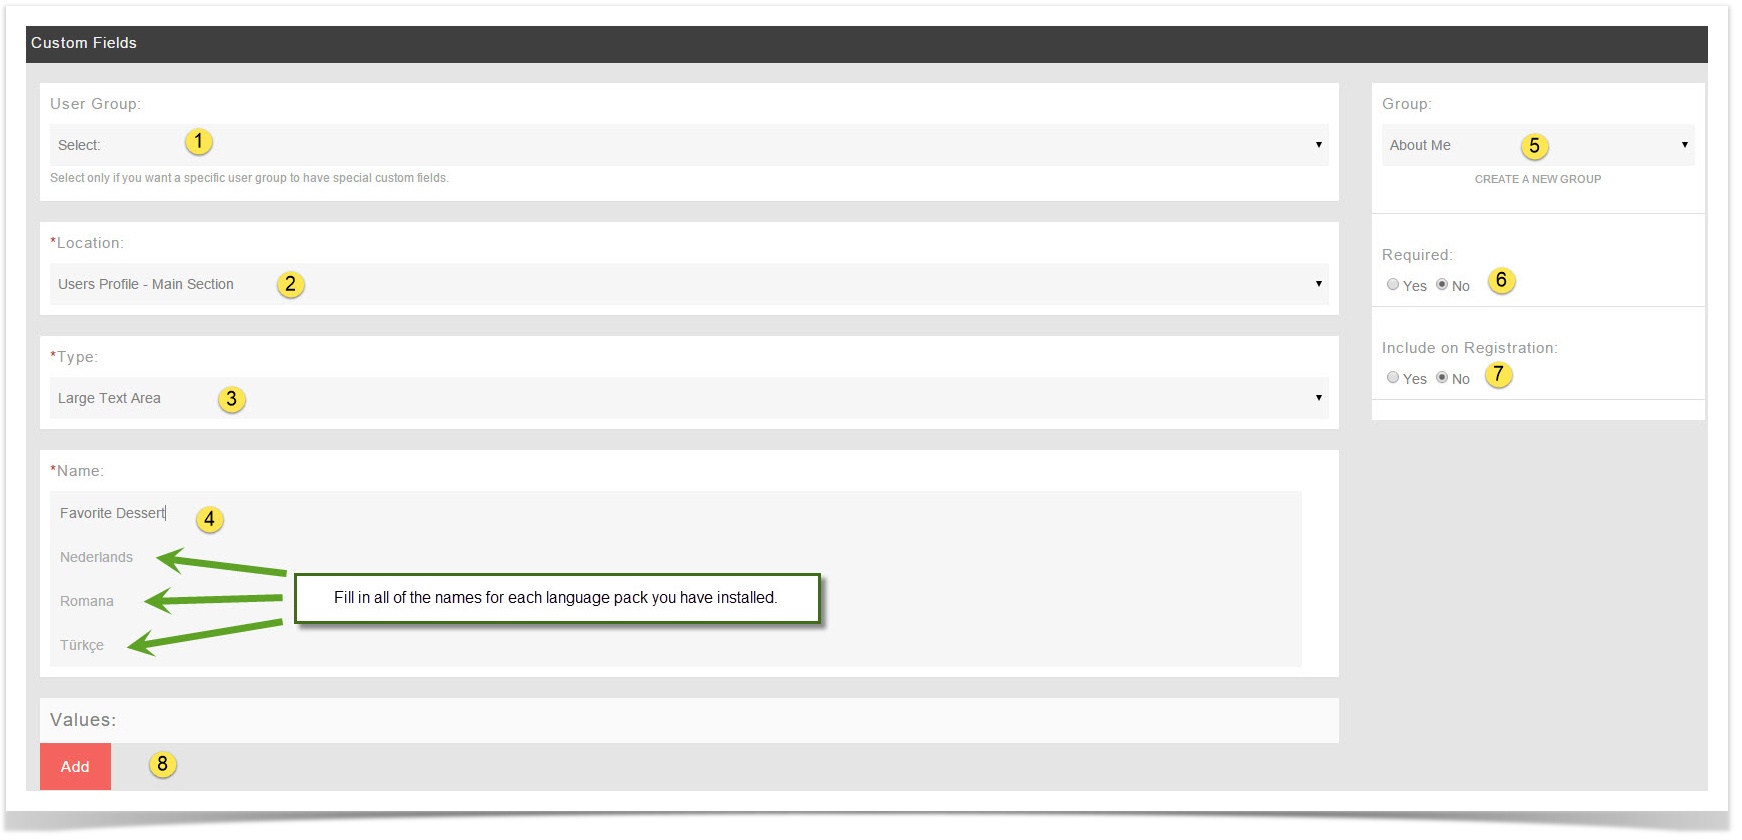
Select the user group this is for.
- Location: Choose Main or Basic. You might want to experiment before deciding which one to choose to see which you like best.
- Type: Choose from Large Text Area, Small Text Area, Selection, Multiple Selection, Radio or Checkbox. Experiment to see how these work for what you want to do.
- Name: This is what the user will see so be sure to put a good name for it. You'll want to fill in any other languages you have too. In our example, we used Favorite Dessert for this custom field.
- Group: The Group you created abovebelow if you want to use a group other than the default About Me.
- Required: Do you want users to be required to fill in this field when they edit their profiles?
- Include on Registration: Set this to No as you cannot have a custom field that is user group specific on the registration since the user is not in any special user group until after they've finished registering.
- Add: This adds the custom field to your site.
Creating Custom Groups for One User Group
- Click Custom Fields
- Click Create A Custom Field
- Click Create a new Group
- Fill in the form and choose a user group that this is for. You can only select one user group for this.
- Location: User's Profile
- User Group: The one you're making this for.
- Name: Put a name for this group. If you have other languages installed, be sure to put the name in those too. In our example, we put this one as Business Details.
- Add Group or Cancel: Click to Add when done or Cancel if you don't want to add it.