...
| Info | ||
|---|---|---|
| ||
You are using phpFox version earlier than 4.67.0? Please refer instruction for this article here. |
Requires: phpFox 4.47.0+
| Note | ||
|---|---|---|
| ||
The following tutorial is a basic guide. All hosts have different setups. It could be that the path doesn't work for your server configuration. In that case, please contact your host for the proper path. |
Since version 4.4.0, Cron jobs system of phpFox is required the site admin have to set it up manually. Cron jobs of phpFox are used for some core features such as Groups converting, Groups notifications, Downgrade Expired Subscribers... So, it is necessary to set up Cron jobs system to make sure that the phpFox site can work well as design. Below is some instructions to help the admin can set up the phpFox cron job system easily.
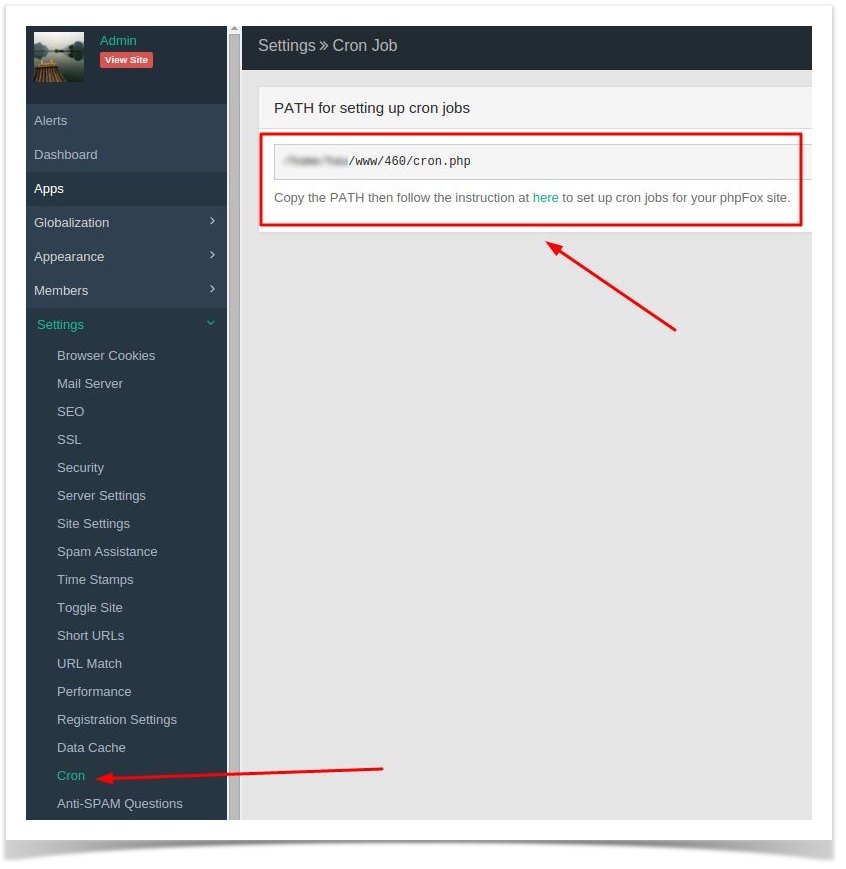
The first step to set up new cron jobs system is getting the path of cron file of URL for cronjob of your phpFox site:
1. Log into AdminCP, select
...
Cronjob Token from Settings menu.
...
Token is like the password for your cronjob, you have to have the correct token on cronjob URL so you can execute the cronjob. Here you can set up the token for yourself, enter any phrase you want to set as token and git Save Changes.
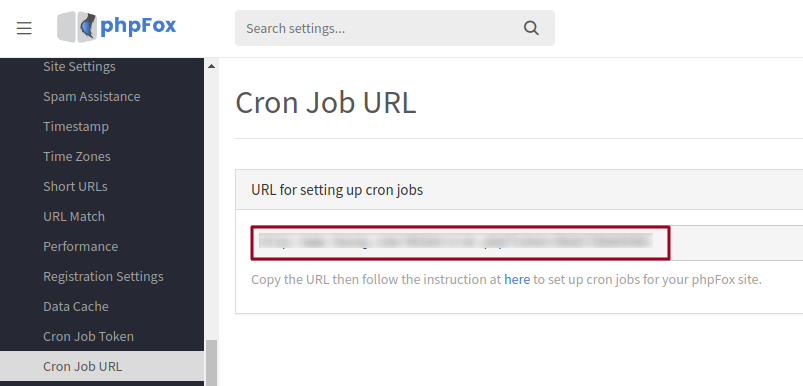
2. Select Cronjob URL from Settings menu, you now will obtain your site's cronjob URL with a pre-defined token from the first step.
The URL will be in format: http(s)://www.<your-domain>.com/cron.php?token=<your_defined_token>
Copy the URL.
Next step, we need to configure Cron job on the server. There are several ways to configure Cron job, depend on your web server environment.
...
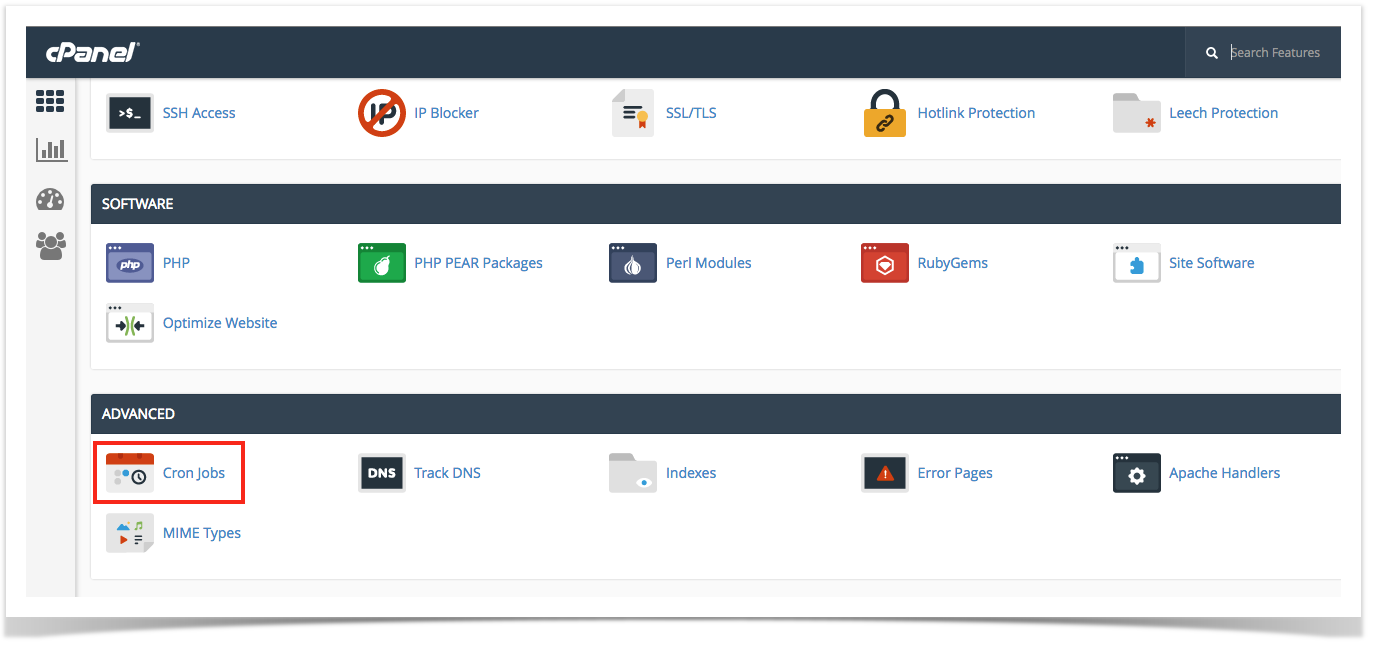
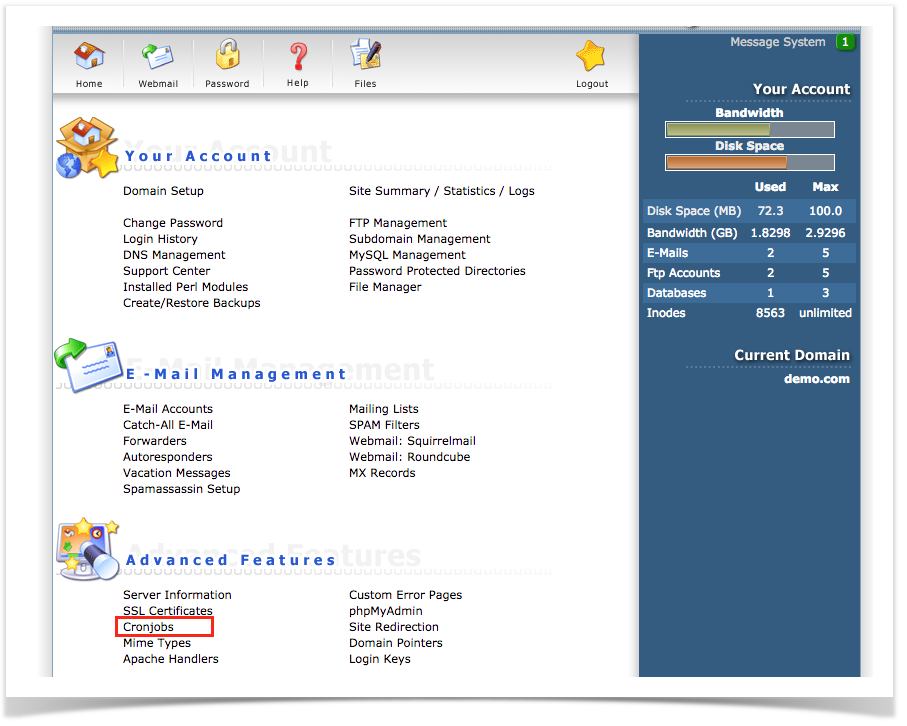
- Step 1: To access the Cron Jobs Menu, click on the corresponding icon located on the main screen of your cPanel interface.
- Step 2 (optional): Enter the email address where the cron output will be sent to in the corresponding field.
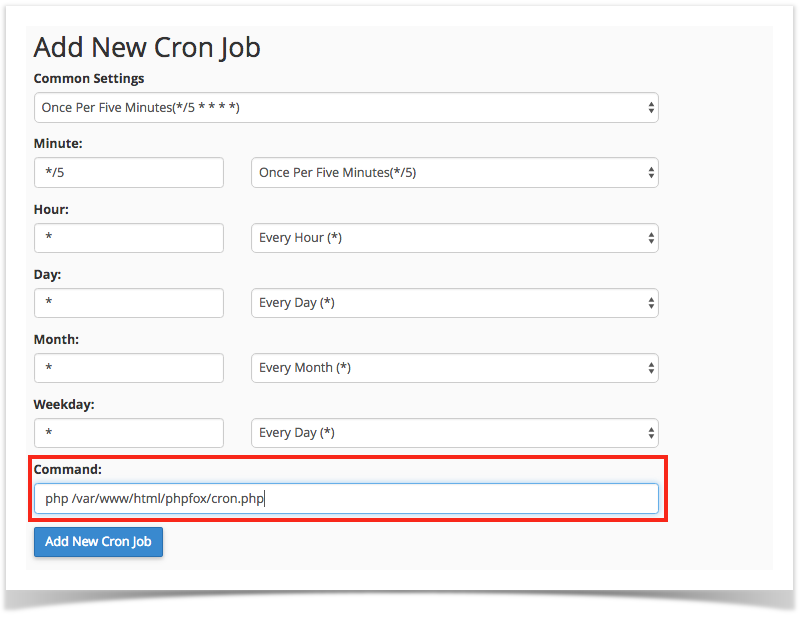
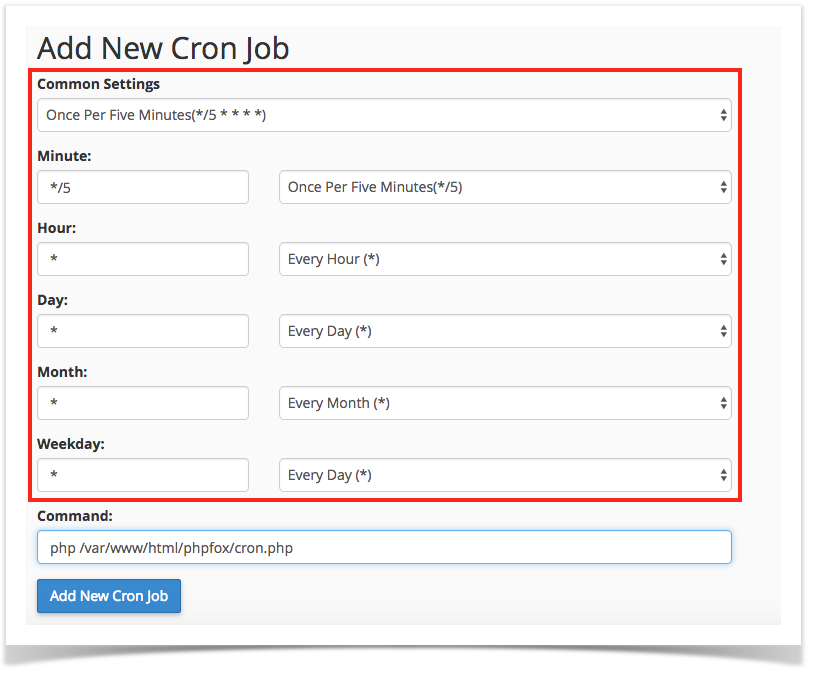
- Step 3: Enter the command "php <path_to_phpfox_root_dir>/cron.php > /dev/null 2>&1curl -s <your_cronjob_url_with_token>" in the blank field next to the Command field. (<path<your_tocronjob_phpfoxurl_root_dir>/cron.phpwith_token> is the PATH we received in the first steppart)
- Step 4: Select how often you wish the command to be run by selecting an option in each of the boxes or by selecting a predefined period from the Common Settings drop-down menu. We suggest running the cron job every 5 minutes.
Step 5: Click on Add New Cron Job to save your changes and set up your cron job.
Note title Note This instruction is just available for cPanel version 56. For other versions please visit the cPanel Cron Job Document to get more information.
...
- Step 1: Log into the DirectAdmin control panel main page, go to the ‘Cronjobs’ page.
- Step 2: Configure cron job: execute the command "php <path_to_phpfox_root_dir>/cron.php > /dev/null 2>&1curl -s http(s)://www.<your-domain>.com/cron.php?token=<your_defined_token>" every 5 minutes (<path_to_phpfox_root_dir>/cron.php is the PATH
(http(s)://www.<your-domain>.com/cron.php?token=<your_defined_token> is the URL we received in first steppart).
...
- Step 3: Click on "Add" button to add the phpFox cron job.
- Step 4 (optional): Set up the email address to receive the cron output.
...
- Step 1: Log in to your web server via sshSSH access.
- Step 2: Enter the command below to edit the Cron jobs list on your server
...
- Step 3: Add the command below to the list to add the phpFox cron job. (<path_to_phpfox_root_dir>/cron.php is the PATH
(http(s)://www.<your-domain>.com/cron.php?token=<your_defined_token> is the URL we received in first steppart).
With this command, the phpFox Cron job will be executed every 5 minutes.
| Code Block | ||
|---|---|---|
| ||
*/5 * * * * php <path_to_phpfox_root_dir>/cron.php > /dev/null 2>&1curl -s http(s)://www.<your-domain>.com/cron.php?token=<your_defined_token> |
- Step 4: Save the change and the phpFox cron job have been set up successfully.
Set up on Window Server
Create a schedule task to execute the command "
...
