| Table of Contents |
|---|
This tutorial will show you how to create or edit a block for your website.
| Excerpt | ||||
|---|---|---|---|---|
|
This assumes you are already logged in as the Admin user and are logged into the AdminCP.
Creating Blocks
- Click Blocks
Anchor first image first image 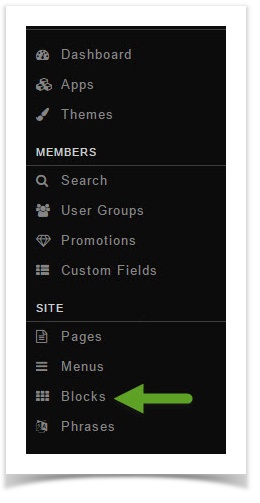
- Click Blocks
- Click Add Block in the top right of the screen

- In the popup, select:
Anchor popup popup - Title - Put a title for this block so you know what it is when you need to manage it later on.
- Type - PHP Block, PHP Code or HTML Code. A PHP Block is one that is already made as a coded block that you loaded or added to your site's files on the server. PHP Code and HTML Code Blocks are blocks you will add code to right within the coding area.
- Controller - This is where you want the block to show, what page on the site for example core.index-member is the member homepage or blog.index would be the main page of the blog section. An index page is normally the very first page you see when going to an area such as blogs, pages, marketplace, etc.
- Component will only show if you've chosen PHP Block as your choice as this is to tell the script where this block is coded, what module was this made for. It will correspond with the folder on the server that you loaded your files to or that the default features came with. For example, if you want to make a block to show Featured Photos and we already have that available as a default block, you just need to enable it. You would click Component and scroll down to the Photo selection in the list and click the --featured.
- Placement is where, on the page, you want to show this block. There are defined block positions for each theme. You can click beneath the placement drop down to View Sample Layout for that theme.
- PHP/HTML code will only show if you chose the Type option either PHP Code or HTML Code block.
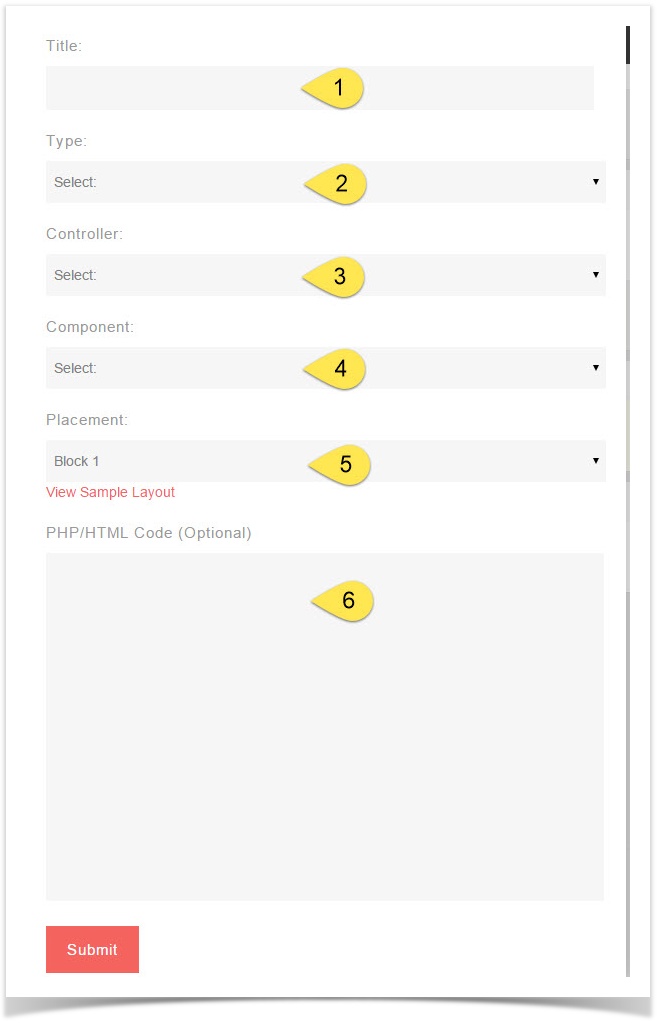
- Click Submit when done and clear cache after.
Editing Blocks
- Click Blocks (see first image in the step for Creating Blocks)
- You'll now see a listing of all of the block controllers in a menu to the left. The core.index-member controller is selected by default.
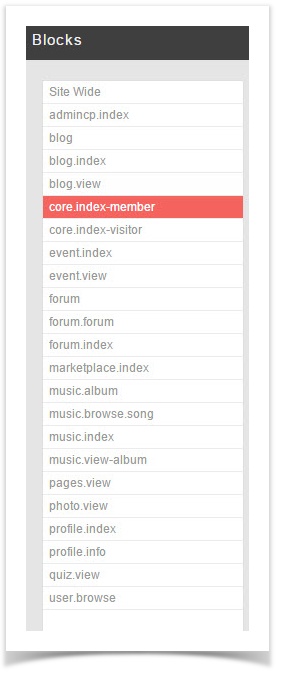
- To the right of the controller listing is a list of all of the blocks on the controller that you chose (core.index-member for example).
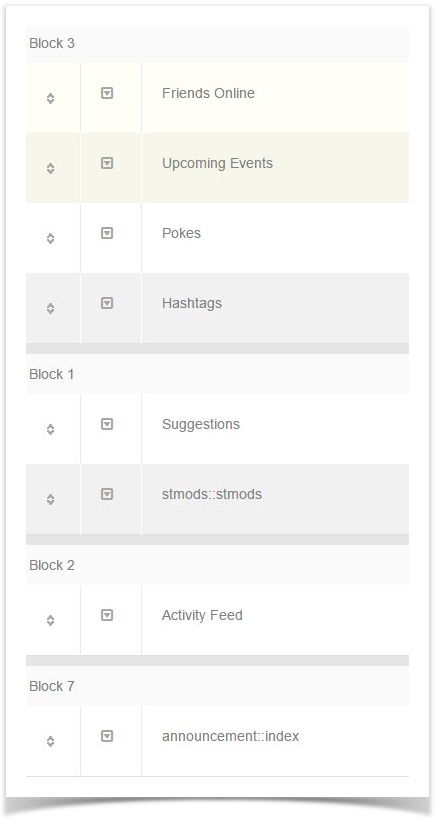
To arrange the blocks
- Click the drag symbol to the left of the block name and drag it up or down. You will see a spinning icon in the bottom right once you finish moving the block. That shows it is saving the position.

- Once you've moved the blocks where you want them, clear cache.
To edit or delete a block:
- Click the Edit arrow to the left of the block to edit it or click Delete to delete it. Note that it is not a good idea to delete default blocks. Please see the step for disabling a block instead.
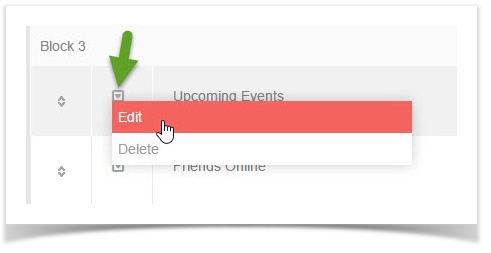
- Once you click the edit arrow, you'll see a popup and can change things as shown in the popup section in the step for Creating Blocks.
- Once you've edited the block how you want it, clear cache.
To disable or enable a block:
- Click the Disable (Deactivate) icon to the far right of the block you want to disable and it will change to Grey for disabled. It is best not to delete default blocks and to disable them instead of deleting. The image below shows an activated (Red) and deactivated (Grey) block. You can enable (activate) a block by clicking the grey icon and it will turn to red for enabled.

- Once you've disabled/enabled the blocks you want to disable/enable, clear cache.