| Info | ||
|---|---|---|
| ||
You are using phpFox version earlier than 4.6.0? Please refer instruction for this article here. |
In general, the full installation includes mandatory steps:
- Download package and upload source onto the server
- Configure folder permissions
- Proceed installation
- Set up cron
Downloading
Download the latest version of phpFox from here
Once you have downloaded and unzipped the package, you should see something like this…
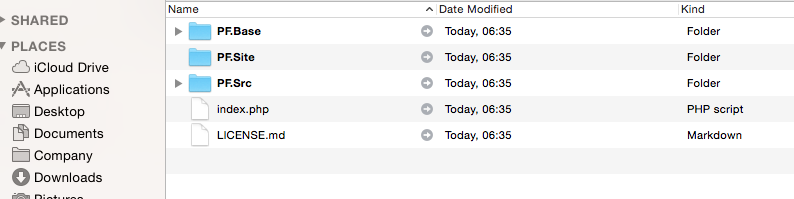
You are to upload those files and folders to your sites root directory.
Hint: If you have cPanel you will have a File Manager that has an Unzip feature. You could ZIP up those files/folders and upload the one ZIP file. Then unzip it on your server.
Folder Permissions
Once you have uploaded all the files/folders. You need to grant full read/write access (usually 0777) to the following 2 folders:
- PF.Base/
- PF.Site/

Note: Once you have completed the install you can return the permissions for the folder PF.Base back to what it originally was set to.
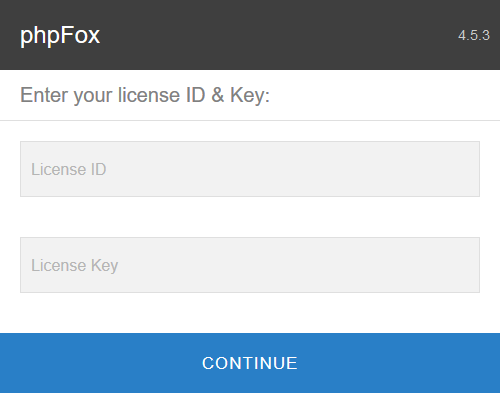
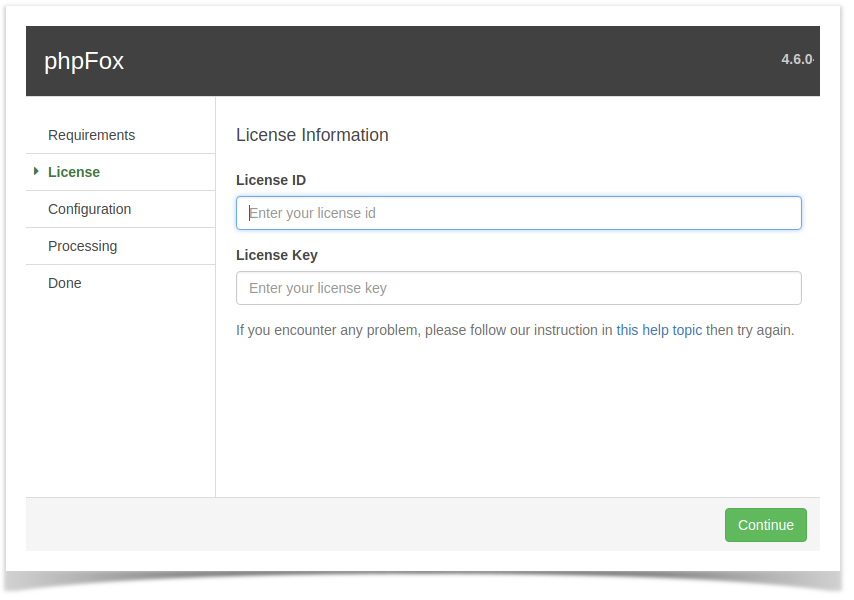
Enter your License ID & Key
...
Note: Do not check "Recurse into subdirectories"
Proceed Installation
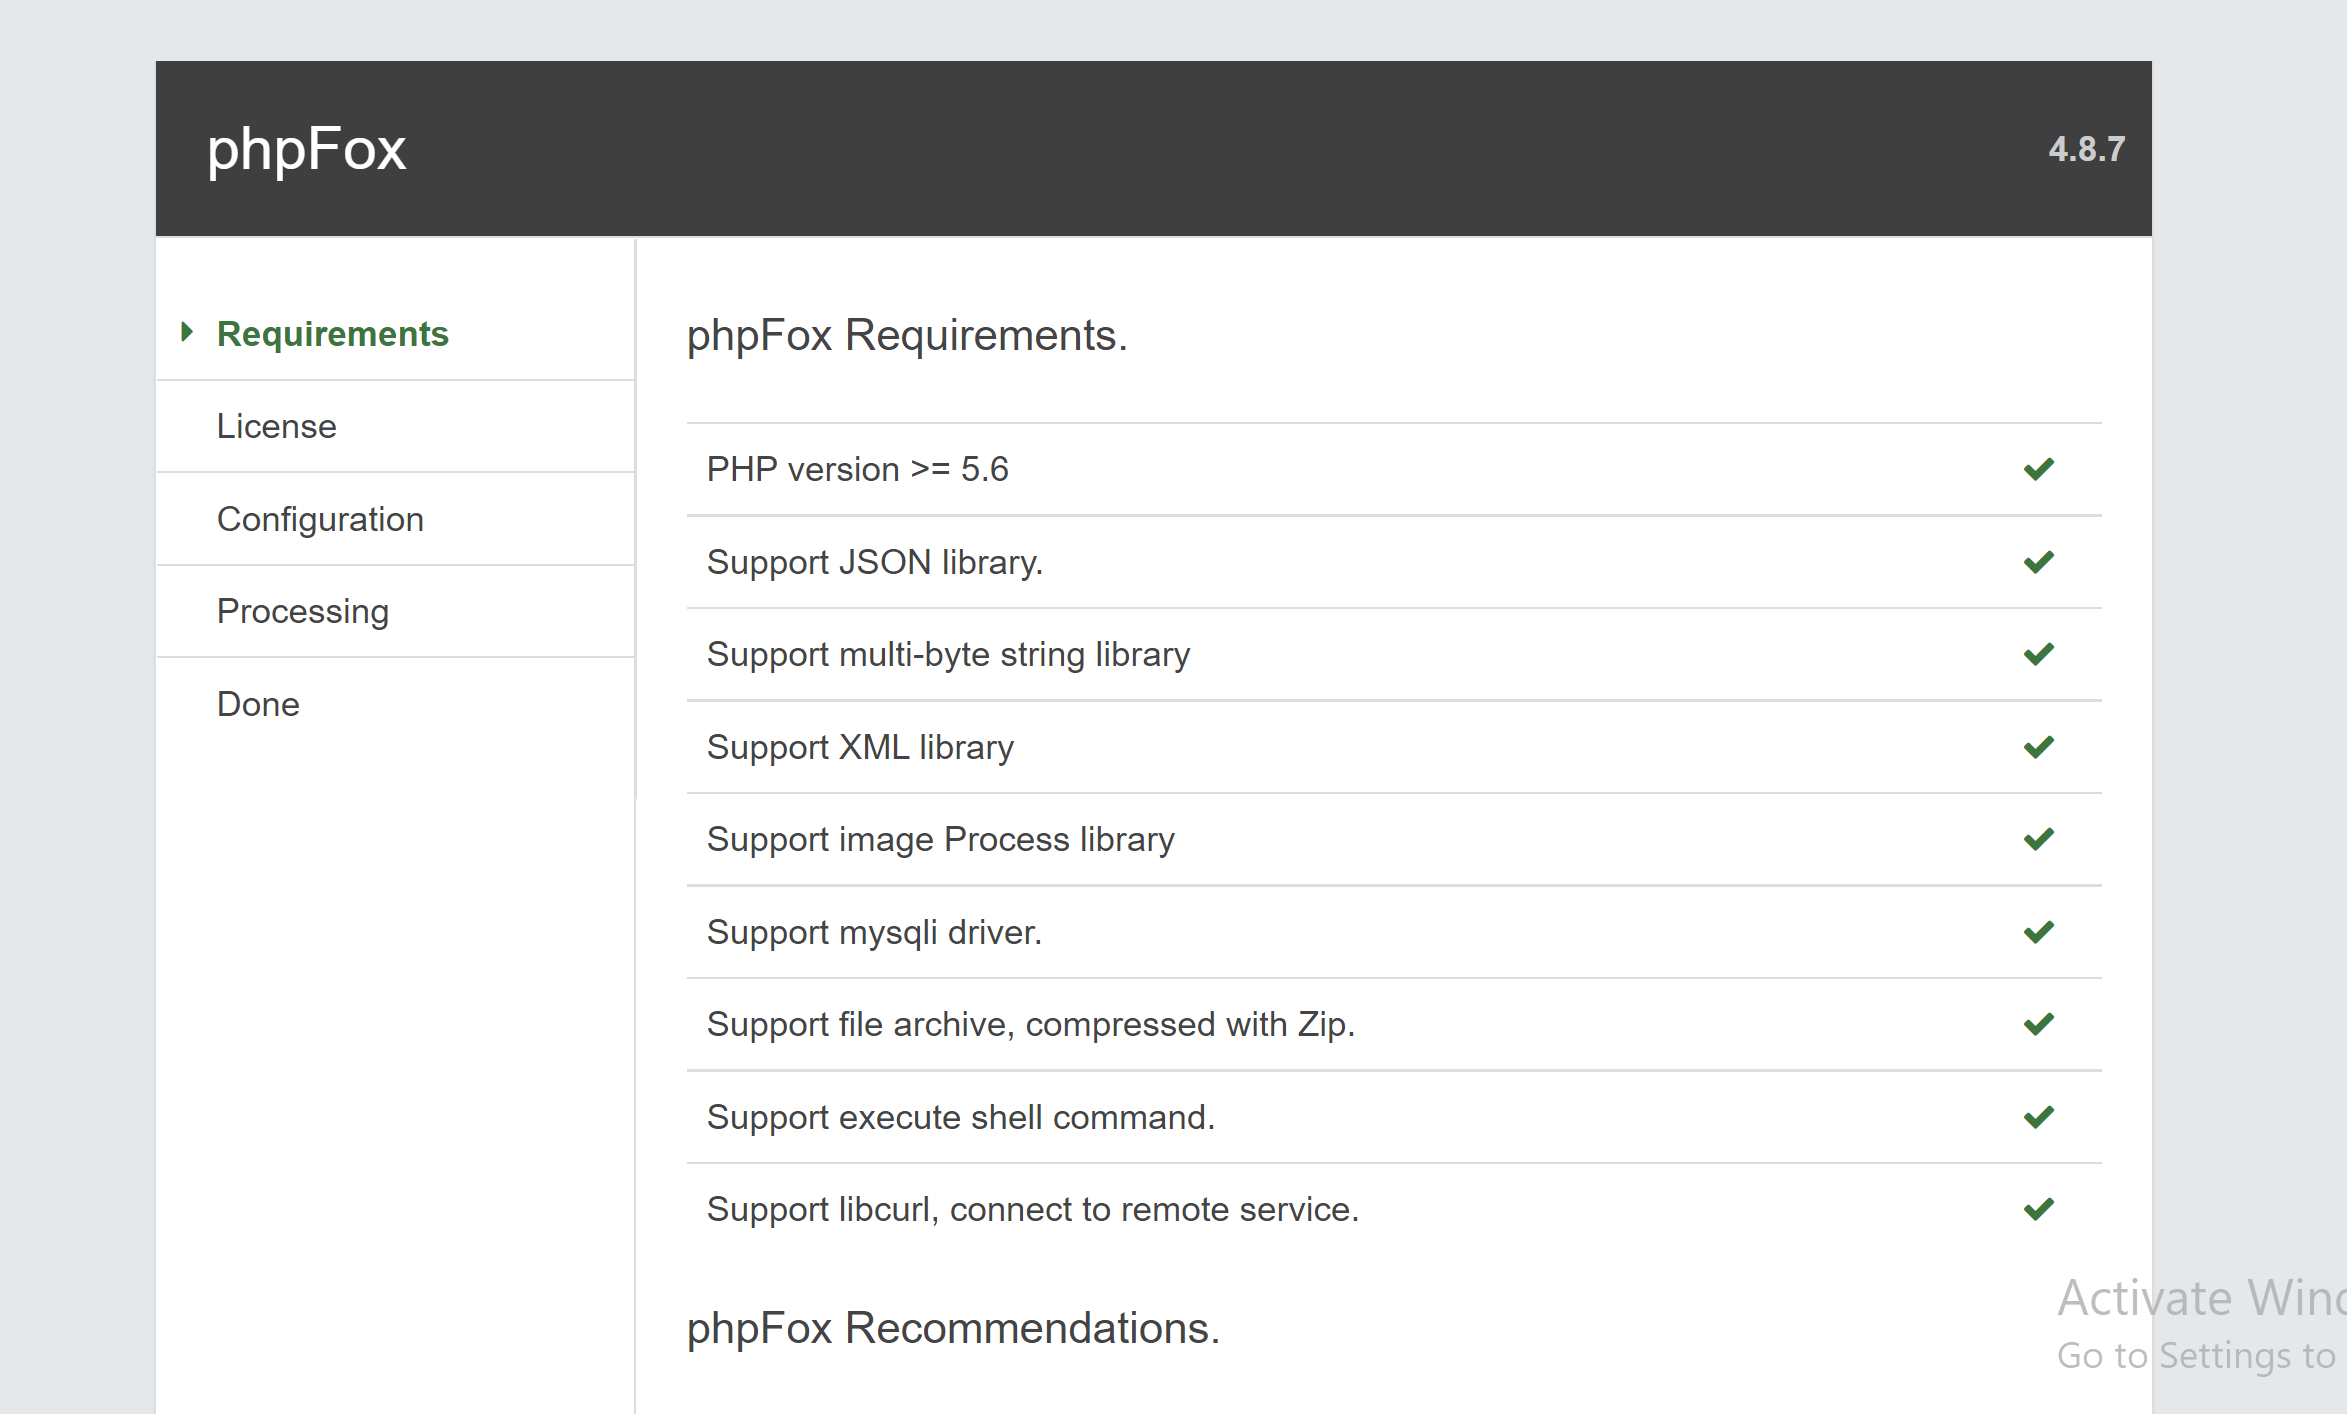
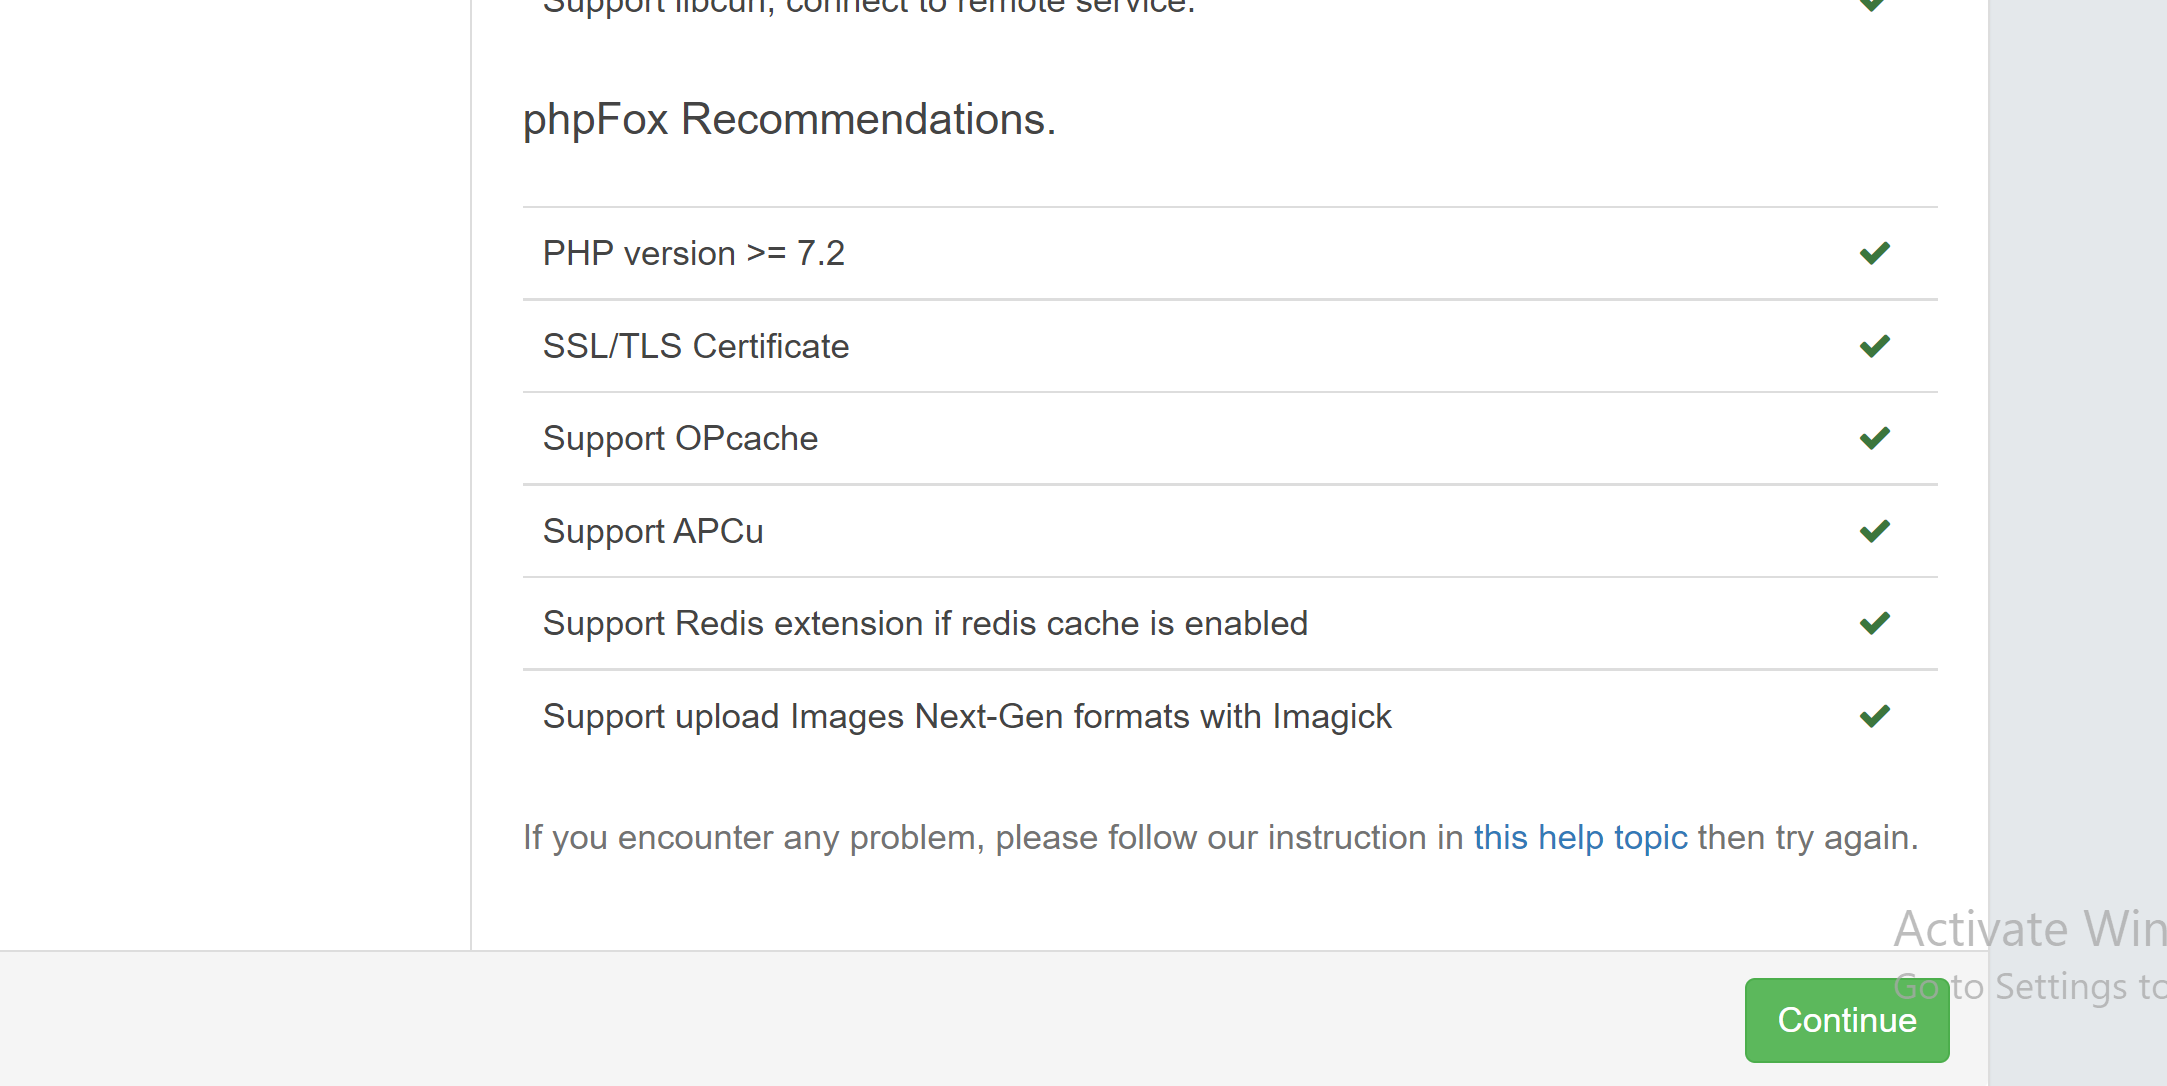
System Requirements
Now, you will need to open the browser with your domain (For example example http://domainsite.com) to start the installation script. The In the first step, the system will check all the requirements in order to run the script. You can see check (√) signs when if passed and (X) if your system doesn't meet the requirements.
Enter your License ID & Key
Next step, the following form will show for you to enter your phpFox License ID & Key, which was sent to you via an email directly after your purchase.
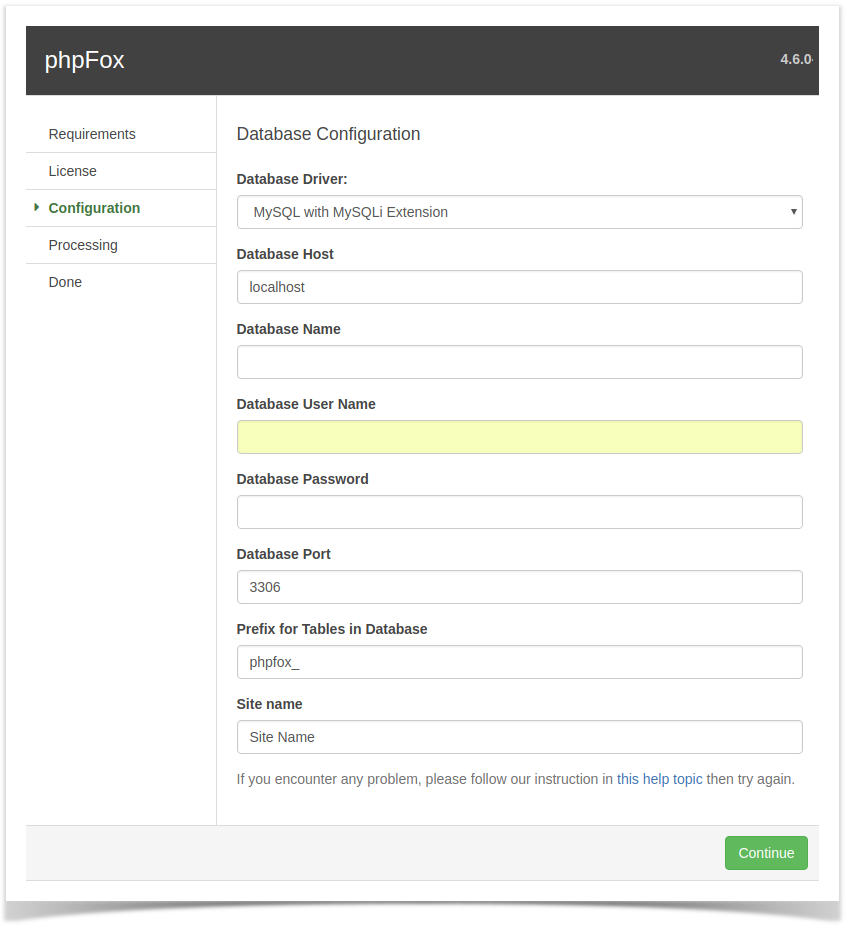
Database Configuration
phpFox uses MySQL/MySQLi and you can use a local or remote server. If you do not have or know your database credentials, just contact your host and they will point you in the right direction.
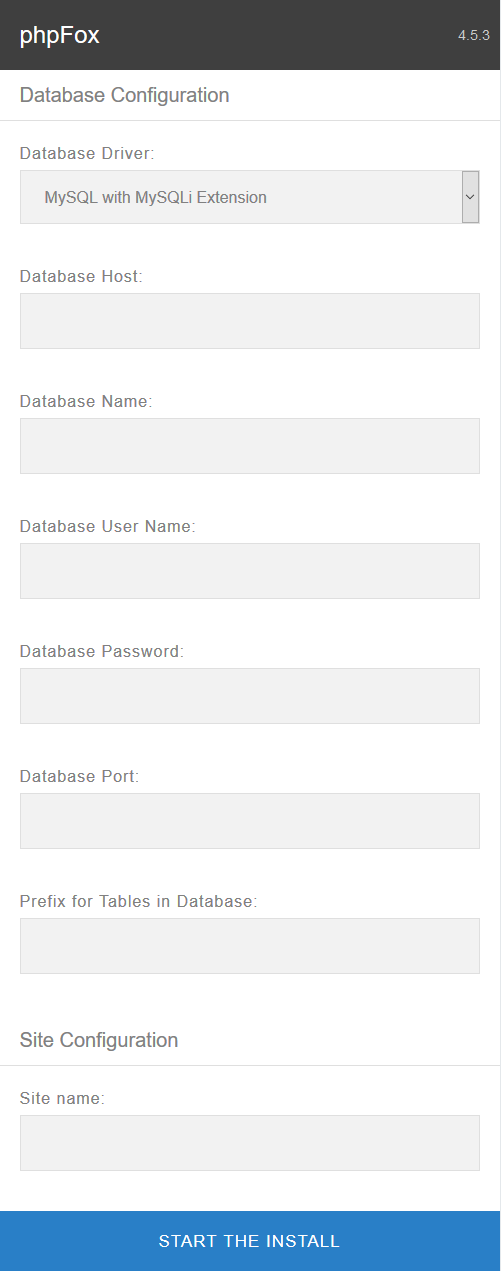
Once you have entered all the correct details and run the web installer, it will get everything setup set up in no time.
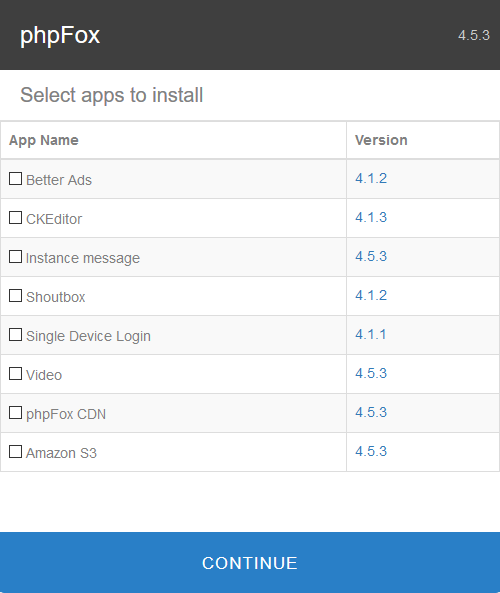
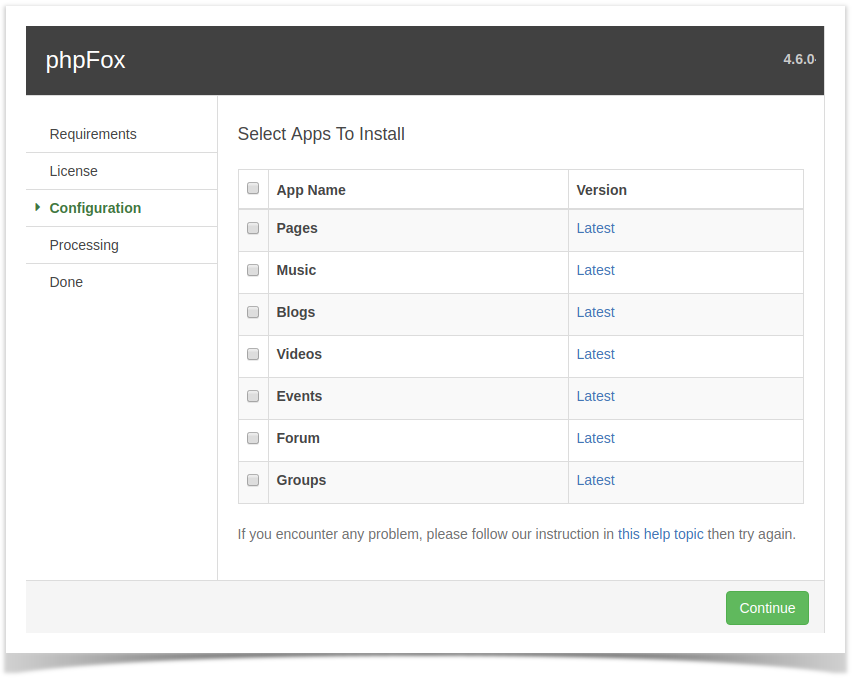
Select phpFox apps to install
Then you will select phpFox apps that you want to install on new site. (this step is required from version 4.56.30)
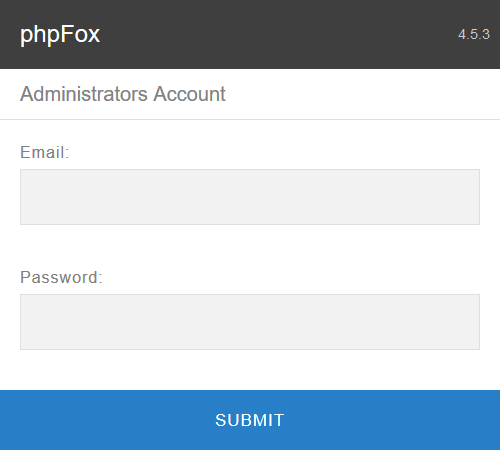
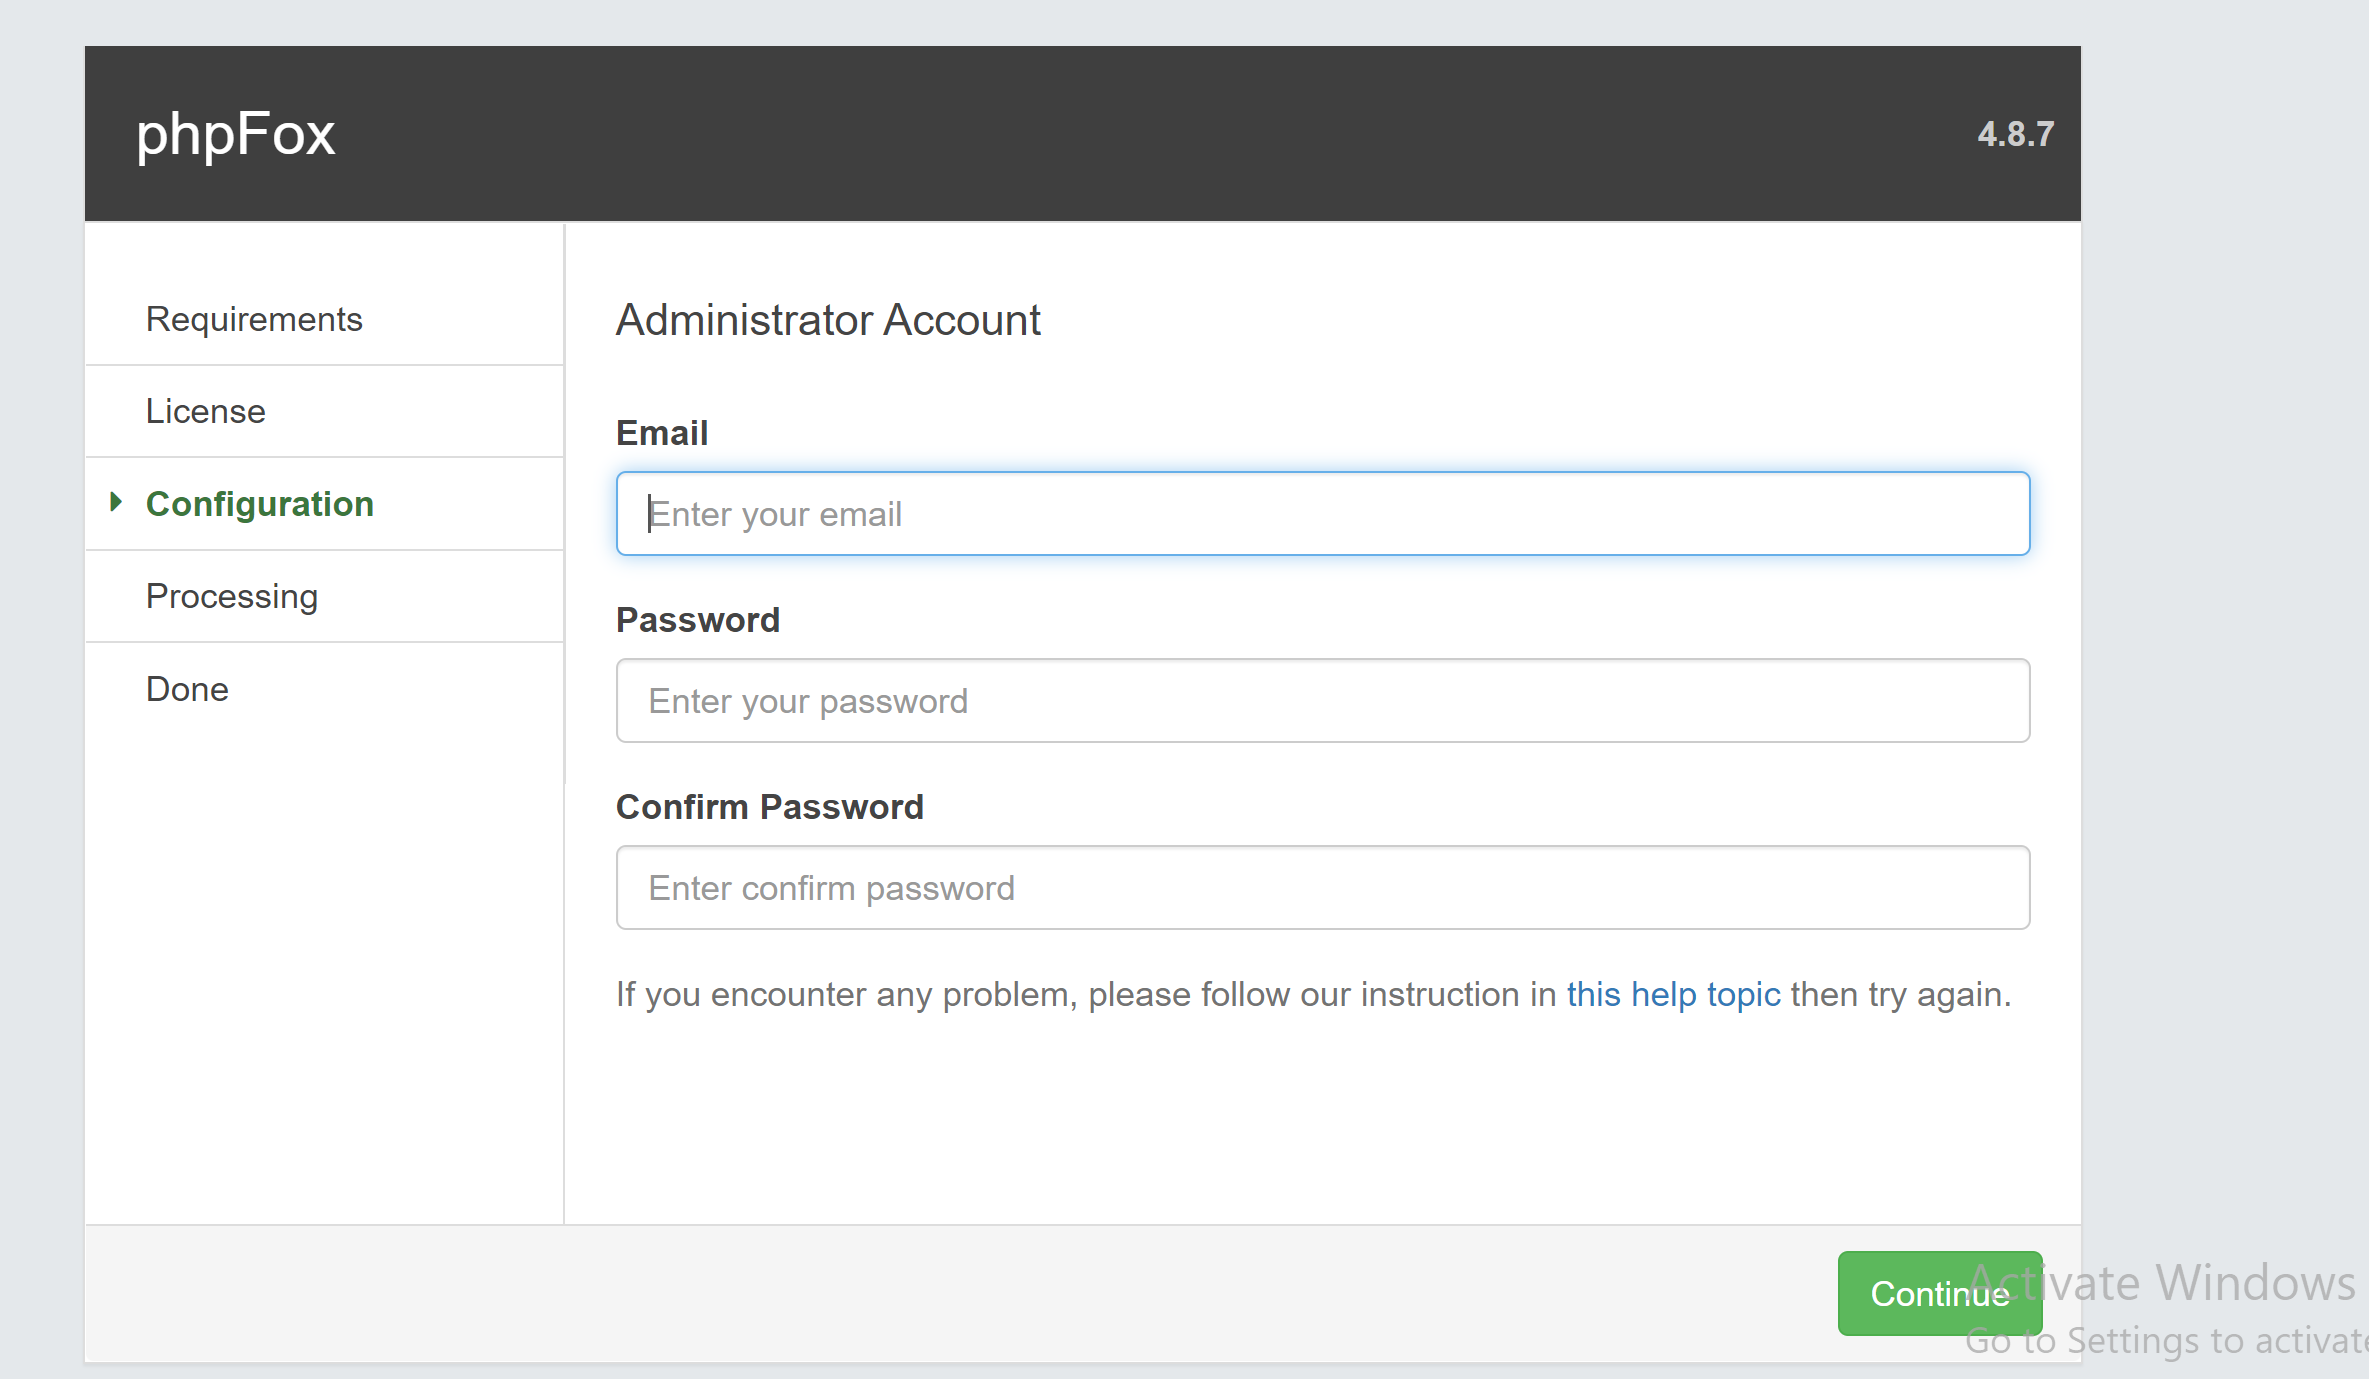
Administrators Account
You are almost done! Your final step will be to create an administrators account. You can change any of the details you add here later, so don’t sweat it. One thing you might want to take a moment to think about is your password. Make it a good one, your Admin account comes with great power.
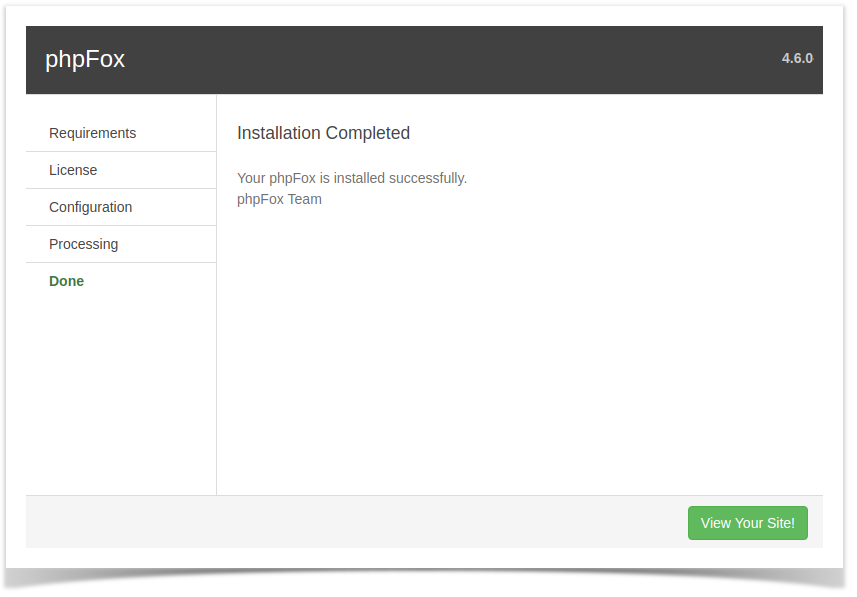
Congratulations! You have successfully installed phpFox.
Set up Cron
Our version 4.4 and up requires a Cron to be set up . This is for several things that used to be done via the old phpFox cron. That process doesn't run now. In order to have the old messages deleted, group notifications, importing/converting old v4 groups to the new Groups app, and several other important tasks, you must set up the cron.
...
Remove the above file or rename it when done installing.
Remove Installation Log
In order to prevent security risks, this step needs to proceed right after the installation is completed without any problem. Please go to folder /PF.Base/file/log/ and remove the installation.log file there. Since version 4.6.1 build 4, this file will be removed automatically if the installation is completed properly.
Make your phpFox site more secure
This is SHOULD HAVE step to make your site more secure but it requires technical knowledge about the server system. Therefore, please feel free to contact your system admin or hosting provider for help if you are not familiar with server stuff.
- Set the"webserver user" account to be the owner of all files and folders.
- All files have permission 644
- All folders have permission 755
Note: "webserver user" is a user account on server which can run web or PHP command. In Linux system, this user is usually nginx or apache or www-data.
Having Issues?
You can also find the issues and the solutions in our our Trouble Shooting list.
Installation Service
If you are not comfortable doing the above steps, we offer an installation service that can be purchased either in your Initial Order or via the "Product Addons" services section in the Client Area. Once you have placed the order, you need to provide us with all necessary detail via a ticket so we can perform the installation on your server. The installation will be completed within 36 hours after you provide the detail of your server we are willing to setup your Trial site on our server. Our team will handle all deployment work. You can simply focus on experiencing phpFox features on both front end and backend. Once the installation has been done, we will inform you shortly.
Well done! Feel free to contact us if you have any question. Visit our community to more interact with us, other clients or 3rd party developers.