This guide will instruct you to setup Digital Ocean Space as CDN for your phpFox site.
I. Create Space.
Login to your Digital Ocean (DO) account. After login you will be at the DO Dashboard of your account, you will see created spaces in the list.
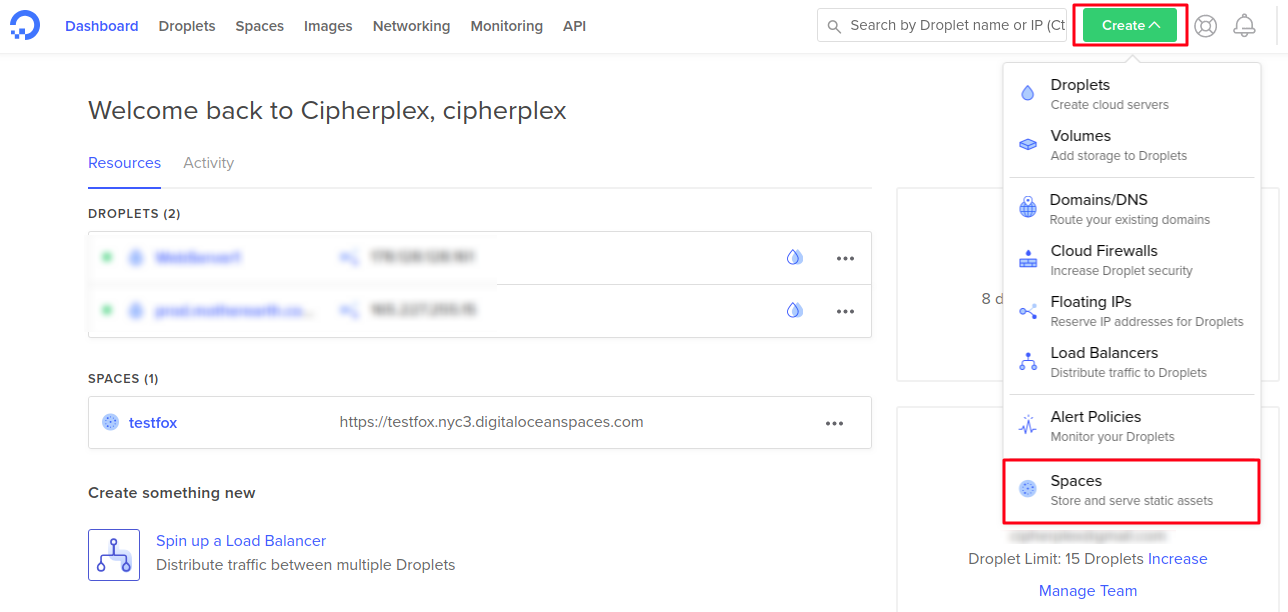
Select Create button from the top right of the Dashboard, then choose Spaces to start creating a new space.
On next screen of Create a Space
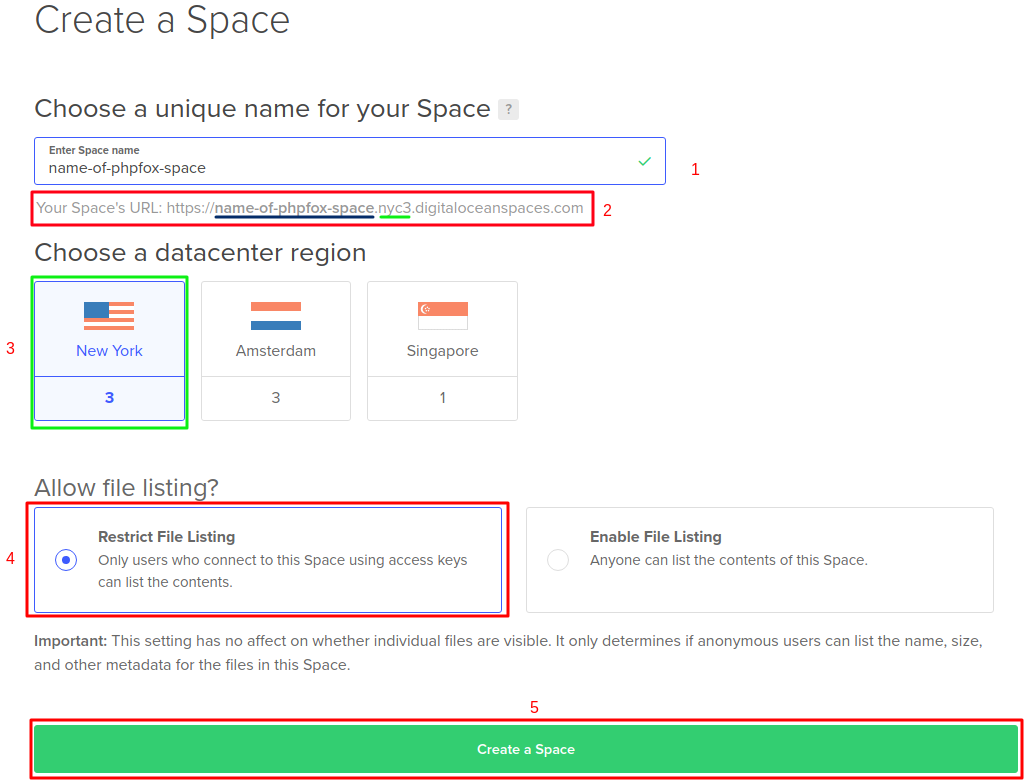
1. Enter your new space's name.
2. The link will be generated automatically. Please take note on 2 parts of the link:
- Blue: Name of the space you set. Note this down for later use.
- Green: Region of the space (This region will be generated depends on the data center you choose in step 3 - In this case, as we choose New York, so the instance will be nyc3). Note this down for later use.
3. Choose the data center region you want to save your files to.
4. Choose file permission. Here you can choose any, but for safety reason for your CDN space, we suggest to choose Restrict File Listing option.
5. Press on Create a Space to create new space.

You will see new space is added to Spaces list.
II. Create API Key
After creating a space, select API on main menu of the Dashboard.
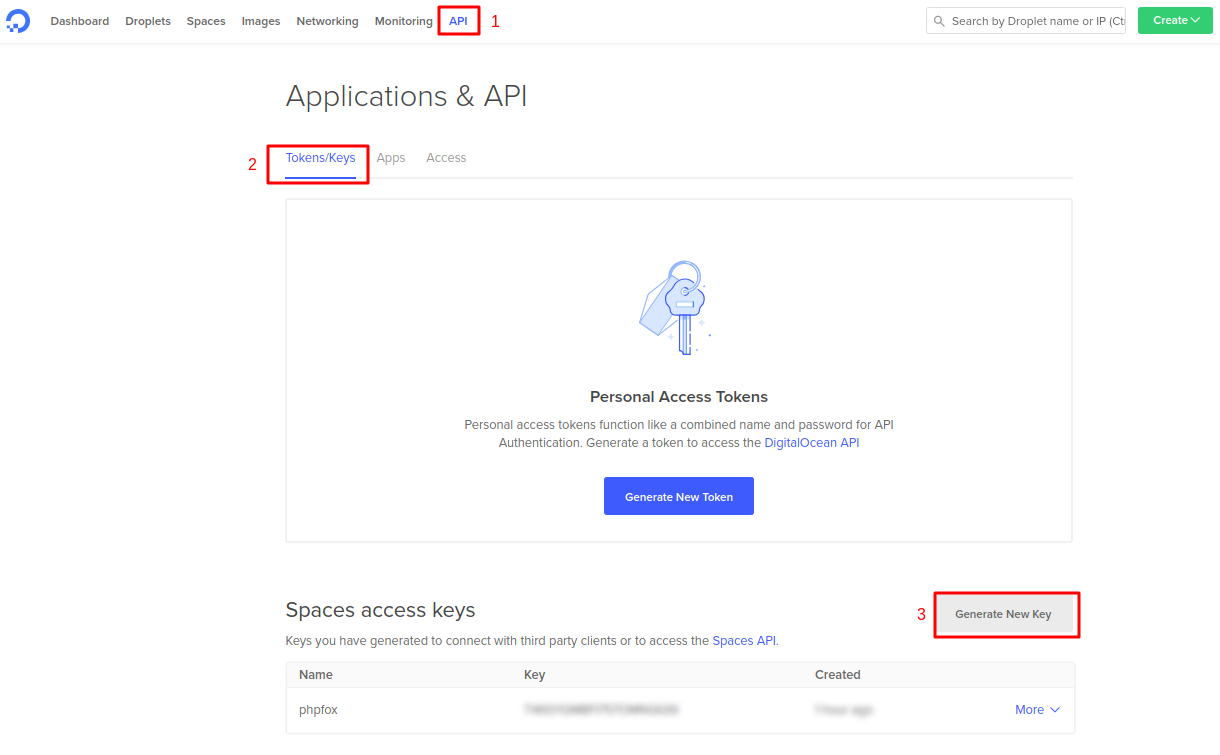
Select tab Tokens/Keys and in Space access keys section, click on Generate New Key to start creating the key.
The wizard will popup, from here you specify the name of the key and select on Tick button.

The new key will be created, pay attention and note these 2 information down:
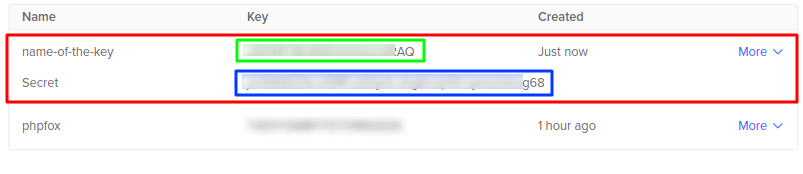
1. Green: The API key
2. Blue: The secret key (Note this down carefully now, as this will be disappeared once you close the page).
III. Setup Digital Ocean CDN
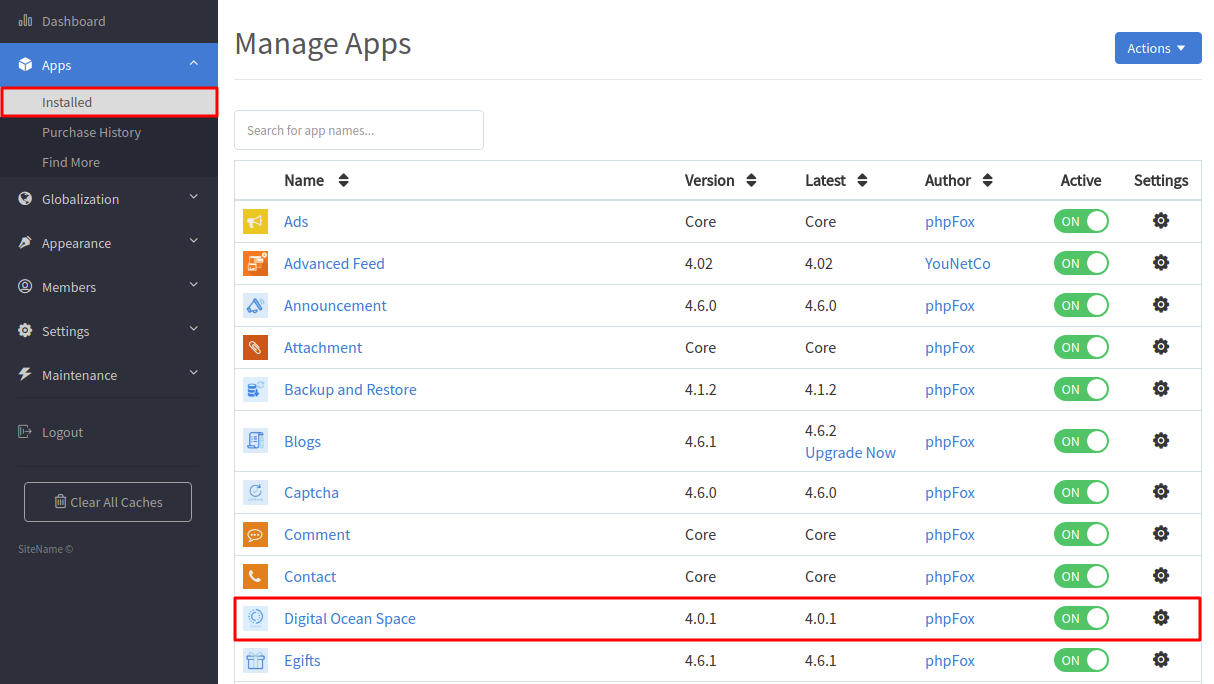
From Admin CP >> Apps >> Installed >> Digital Ocean Space.
On next page, input as follow:
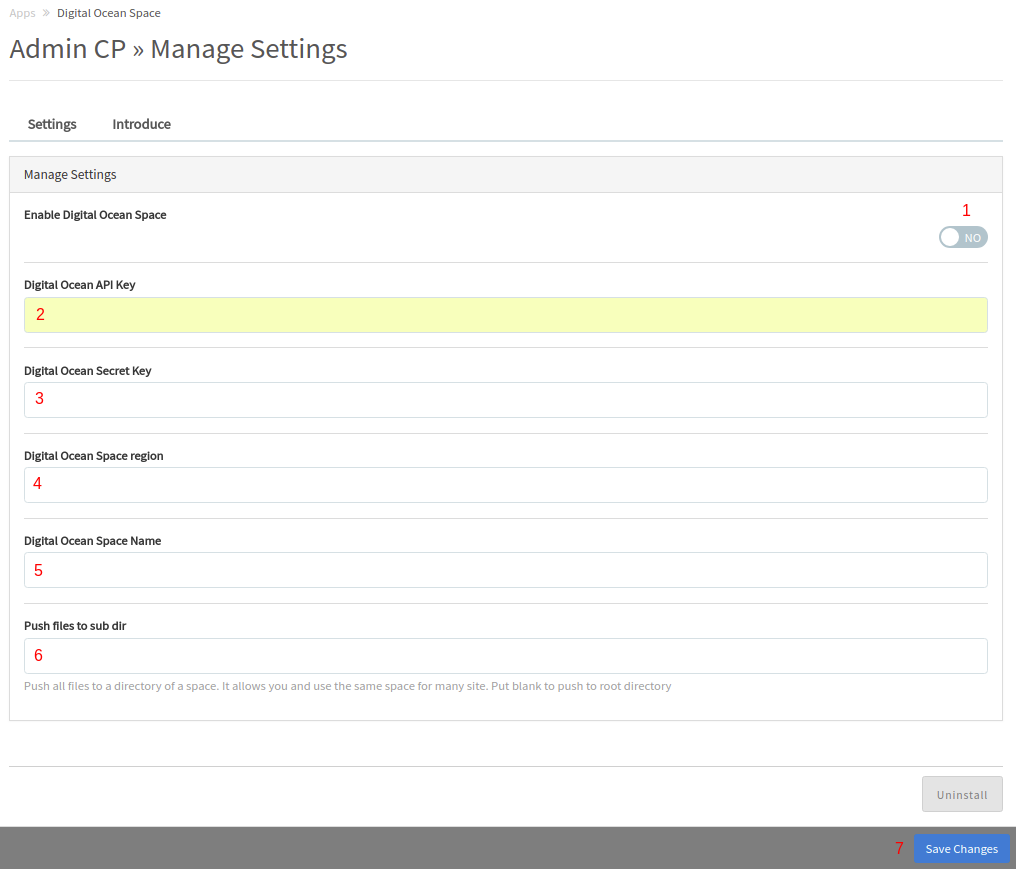
1. Turn on CDN for Digital Ocean Space, by selecting Yes here.
2. DO API Key: Enter information of II.1
3. DO Secret Key: Enter information of II.2
4. DO Space region: Enter information of I.2.Green
5. DO Space Name: Enter information of I.2.Blue
6. (Optional) If you want your files to be saved in a specific folder in the space, you can enter folder name here. Otherwise leave it blank.
Press on Save Changes to save all the inputs.