...
- Make sure you've uploaded an image to your server or image hosting place. This tutorial, we have created an images folder on our server and uploaded a banner.jpg image.
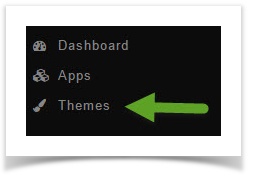
- Click Themes
| Anchor | ||||
|---|---|---|---|---|
|
You'll see screen shots of various themes that you've installed to the right and if you hover your mouse over the Bootstrap theme, you will see an Edit button. Click Edit.Anchor img2 img2
...
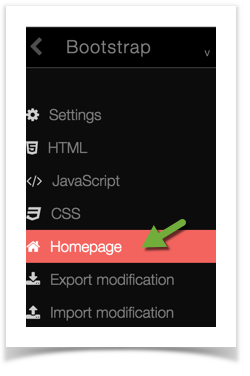
- Once you've opened the theme edit screen, click Homepage.
| Anchor | ||||
|---|---|---|---|---|
|
On the right you will see the default code. You'll need to change that code. A good way to do this is to copy it to a line below the original and then comment out the original code. This way, you can easily change it back if you don't like the results just by deleting your new code and uncommenting the original. Here's how we did it. Copy this code:
Code Block language xml firstline 1 title Original linenumbers true <div class="image_load parent-block" data-apply="row_image" data-src="{$image.image}"></div>to line 2 or below that. Comment the top line (you will see how we did it in the example). Commenting the line hides it from displaying and is ignored by the script. It would now look like this:
Code Block language xml firstline 1 title New code linenumbers true <!--<div class="image_load parent-block" data-apply="row_image" data-src="{$image.image}"></div>--> <div class="image_load parent-block" data-apply="row_image" data-src="{$image.image}"></div>Hit Command + s if using a Mac, or CTRL + s if using a PC to save the changes.
Now that you have the code copied, change the second line so that the data-src points to where your image is hosted. If it is on your server, like our example is, you would not need the full url. Since ours is in an /images folder in our public_html folder on our server, we would put it as the next example shows:
Code Block language xml firstline 1 title Final linenumbers true <!--<div class="image_load parent-block" data-apply="row_image" data-src="{$image.image}">--> <div class="image_load parent-block" data-apply="row_image" data-src="./images/banner.jpg"></div>
Using
...
an Uploaded Image for Neutron Based Themes
- Make sure you've uploaded an image to your server or image hosting place. This tutorial, we have created an images folder on our server and uploaded a banner.jpg image.
- Click Themes (See Image 1)
- You'll see screen shots of various themes that you've installed to the right and if you hover your mouse over the Neutron theme, you will see an Edit button. Click Edit. (See Image 2)
Once you've opened the theme edit screen, click Homepage. (See Image 3)
On the right you will see the default code. You'll need to change that code. A good way to do this is to copy it to a line below the original and then comment out the original code. This way, you can easily change it back if you don't like the results just by deleting your new code and uncommenting the original. Here's how we did it. Copy this code:
Code Block language xml title Step 1 <div id="main-banner"> <div class="image_load" data-src="{$image.image}"></div> <div class="image_info"> {$image.info} </div> </div>
to line 13 or below that. Comment the top code (you will see how we did it in the example). Commenting the code hides it from displaying and is ignored by the script. It would now look like this:
| Code Block | ||||||||
|---|---|---|---|---|---|---|---|---|
| ||||||||
<!--{*
{if isset($featured.server_id)}
<div id="main-banner">
{img server_id=$featured.server_id path='photo.url_photo' file=$featured.destination suffix='_1024'}
</div>
*}
<div id="main-banner">
<div class="image_load" data-src="{$image.image}"></div>
<div class="image_info">
{$image.info}
</div>
</div>--> |
Hit Command + s if using a Mac, or CTRL + s if using a PC to save the changes.
- Now that you have the code copied, change the line, line 8 in our code above, so that the data-src points to where your image is hosted. If it is on your server, like our example is, you would not need the full url. Since ours is in an /images folder in our public_html folder on our server, we would put it as the next example shows. You can also see that we changed line 9 in our code to add a line of info for the image:
| Code Block | ||||
|---|---|---|---|---|
| ||||
<div id="main-banner">
<div class="image_load" data-src="./images/banner.jpg"></div>
<div class="image_info">
Great Image!
</div>
</div> |
If you want the front image to cycle through various featured photos on your site, this is how to do that.
- First, make sure the user you are logged in with can feature photos. It might be a good idea to make only specific user groups, such as Admin and Staff, able to feature photos as any featured photos will show on the visitor page.
- Go to your photo section (yoursite.com/photo or if not using short urls, yoursite.com/index.php/photo) and click on the image you want to make featured.
- Click the Edit icon and select Feature Photo.
...