| Table of Contents |
|---|
| Info | ||
|---|---|---|
| ||
You are using phpFox version earlier than 4.8.0? Please refer instruction for this article here. |
- Downloading
- Folder Permissions
- Web Upgrader
- Enter your License ID & Key
- Upgrade Process
- Set up Cron
- Finishing Up
This guide will help you through the upgrade process of phpFox v4 or higher. This is also for upgrading from phpFox v3 Nebula. If your version is below v3 Nebula, you'll need to first upgrade to that version before upgrading further.
...
IMPORTANT
...
| title | Important |
|---|
...
Always check with third party developers of any apps, themes, modules or language packs before upgrading and note that most third party products don't work from one major version (v1, v2, v3, etc) to a new version. Even minor upgrades can have issues for third party products so always check first.
...
WARNING!
You MUST not upgrade with debug enabled. It will break the upgrade process. Only enable debug if you already are having problems upgrading the site.
Tips
Backup your site files and database before upgrading. This will help in case there is an issue with the upgrade (not common but can happen) such as faulty file upload, server glitch, internet issues, etc.
| Warning | ||
|---|---|---|
| ||
You MUST not upgrade with debug enabled. It will break the upgrade process. Only enable debug if you already are having problems upgrading the site. |
Downloading
Download the latest version of phpFox from from here. Refer to to Downloading the phpFox Script for for the instruction how to download it.
Once you have downloaded and unzipped the package, you should see something like this…
You are to 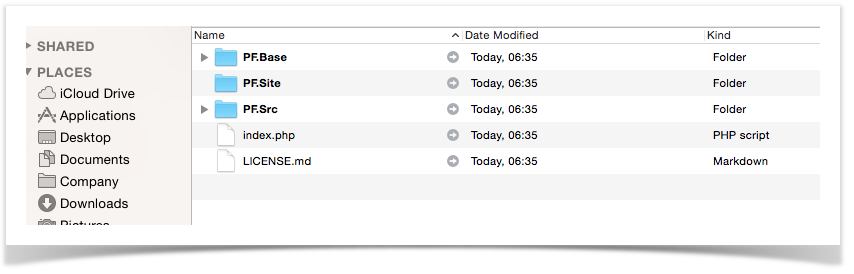
Then, you can upload those files and folders to your sites site's root directory.
NOTE:
- Have to upload ALL individual source files onto the server, choose to overwrite existing files if asked.
- DO NOT delete any existing files or folders (except for the one being overwritten by new files)
Hint: If you have cPanel you will have a File Manager that has an Unzip feature. You could ZIP up those files/folders and upload the one ZIP file. Then unzip it on your server.
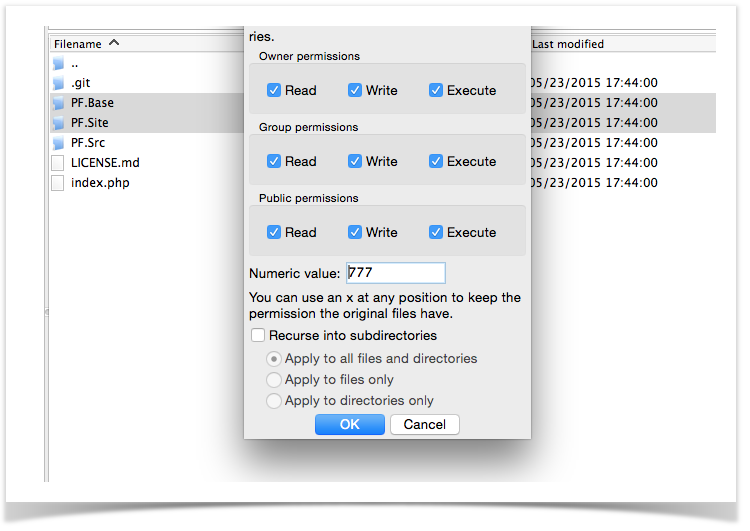
Folder Permissions
Once you have uploaded all the files/folders. You need to grant full read/write access (usually 0777) to the following 2 folders:
- PF.Base/
- PF.Site/
Note: Once you have completed the install you can return the permissions for the
...
folder PF.Base
...
and PF.Site back to what it originally was set to.
...
...
Important
Unless the blog instructions or our forum posts say to run the full upgrade routine, the next steps for Web Upgrader are not needed to upgrade builds (v4.1.2 build 4 to v4.1.2 build 5 for example). If upgrading a build, please skip the Web Upgrader steps and simply do the Final Steps and the Cron Job if you hadn't, then visit your site and clear cache. Remember, you must still run the next steps if we say a full upgrade is required.
Web Upgrader
Fire up your web browser of choice and visit your site by going
http://www.yoursite.com/index.php?phpfox-upgrade=true
The first step of the web install will be to select what type of license to re-assign to this copy of phpFox.
...
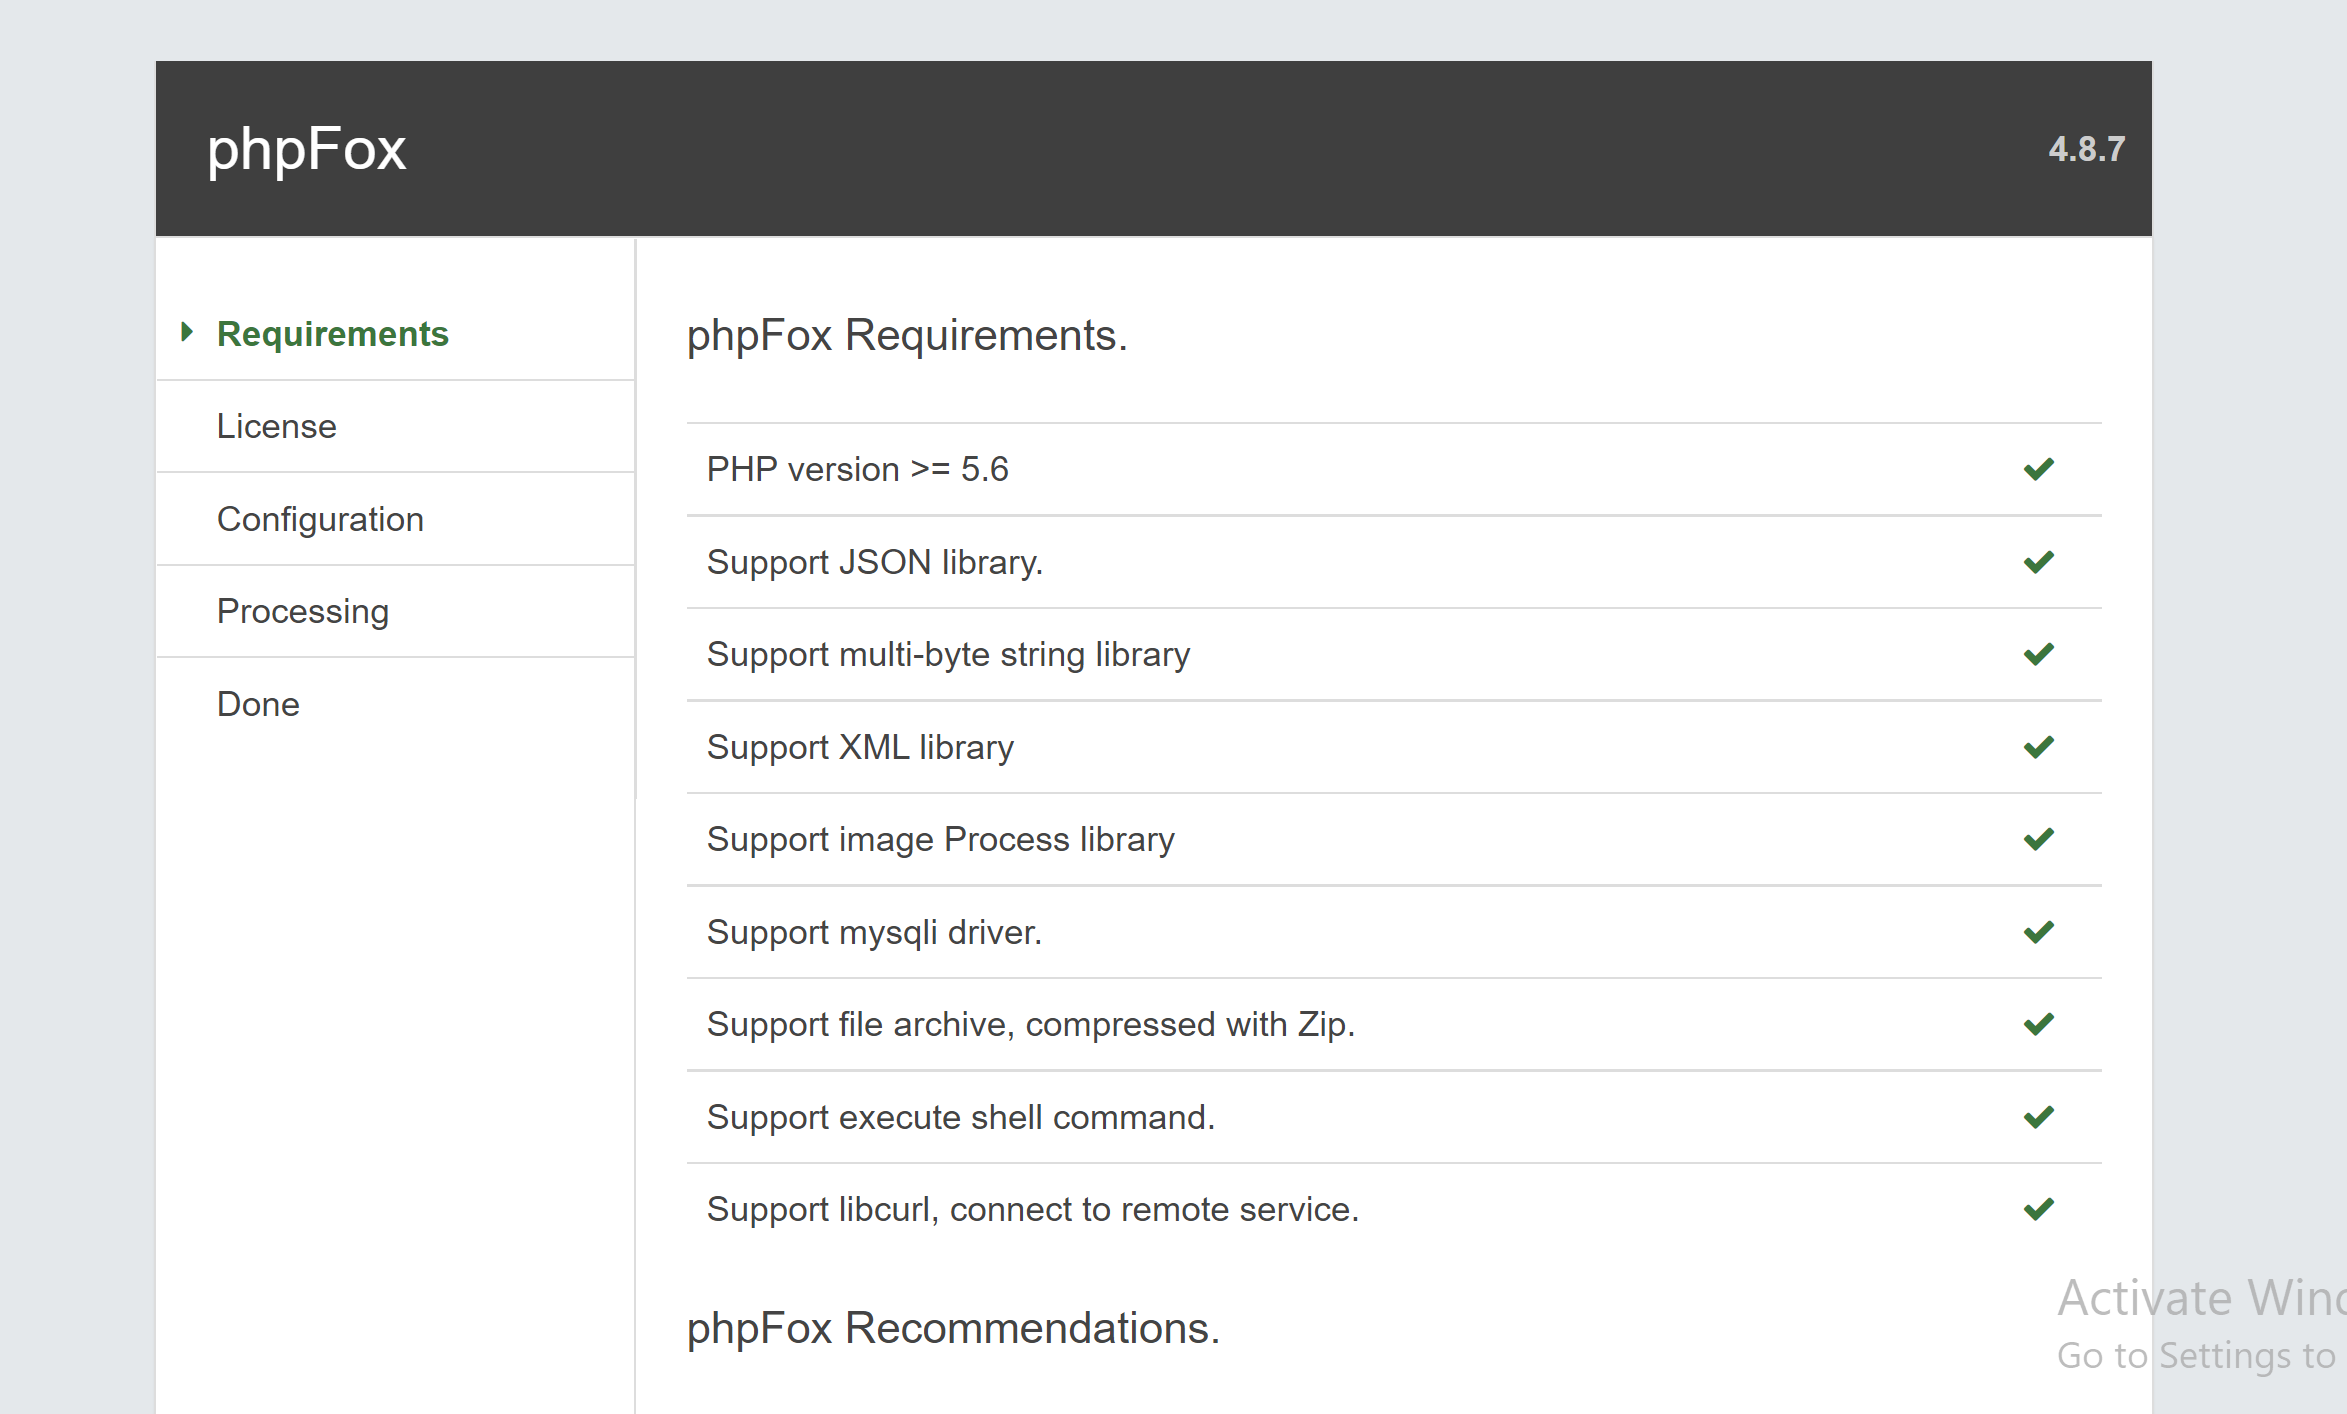
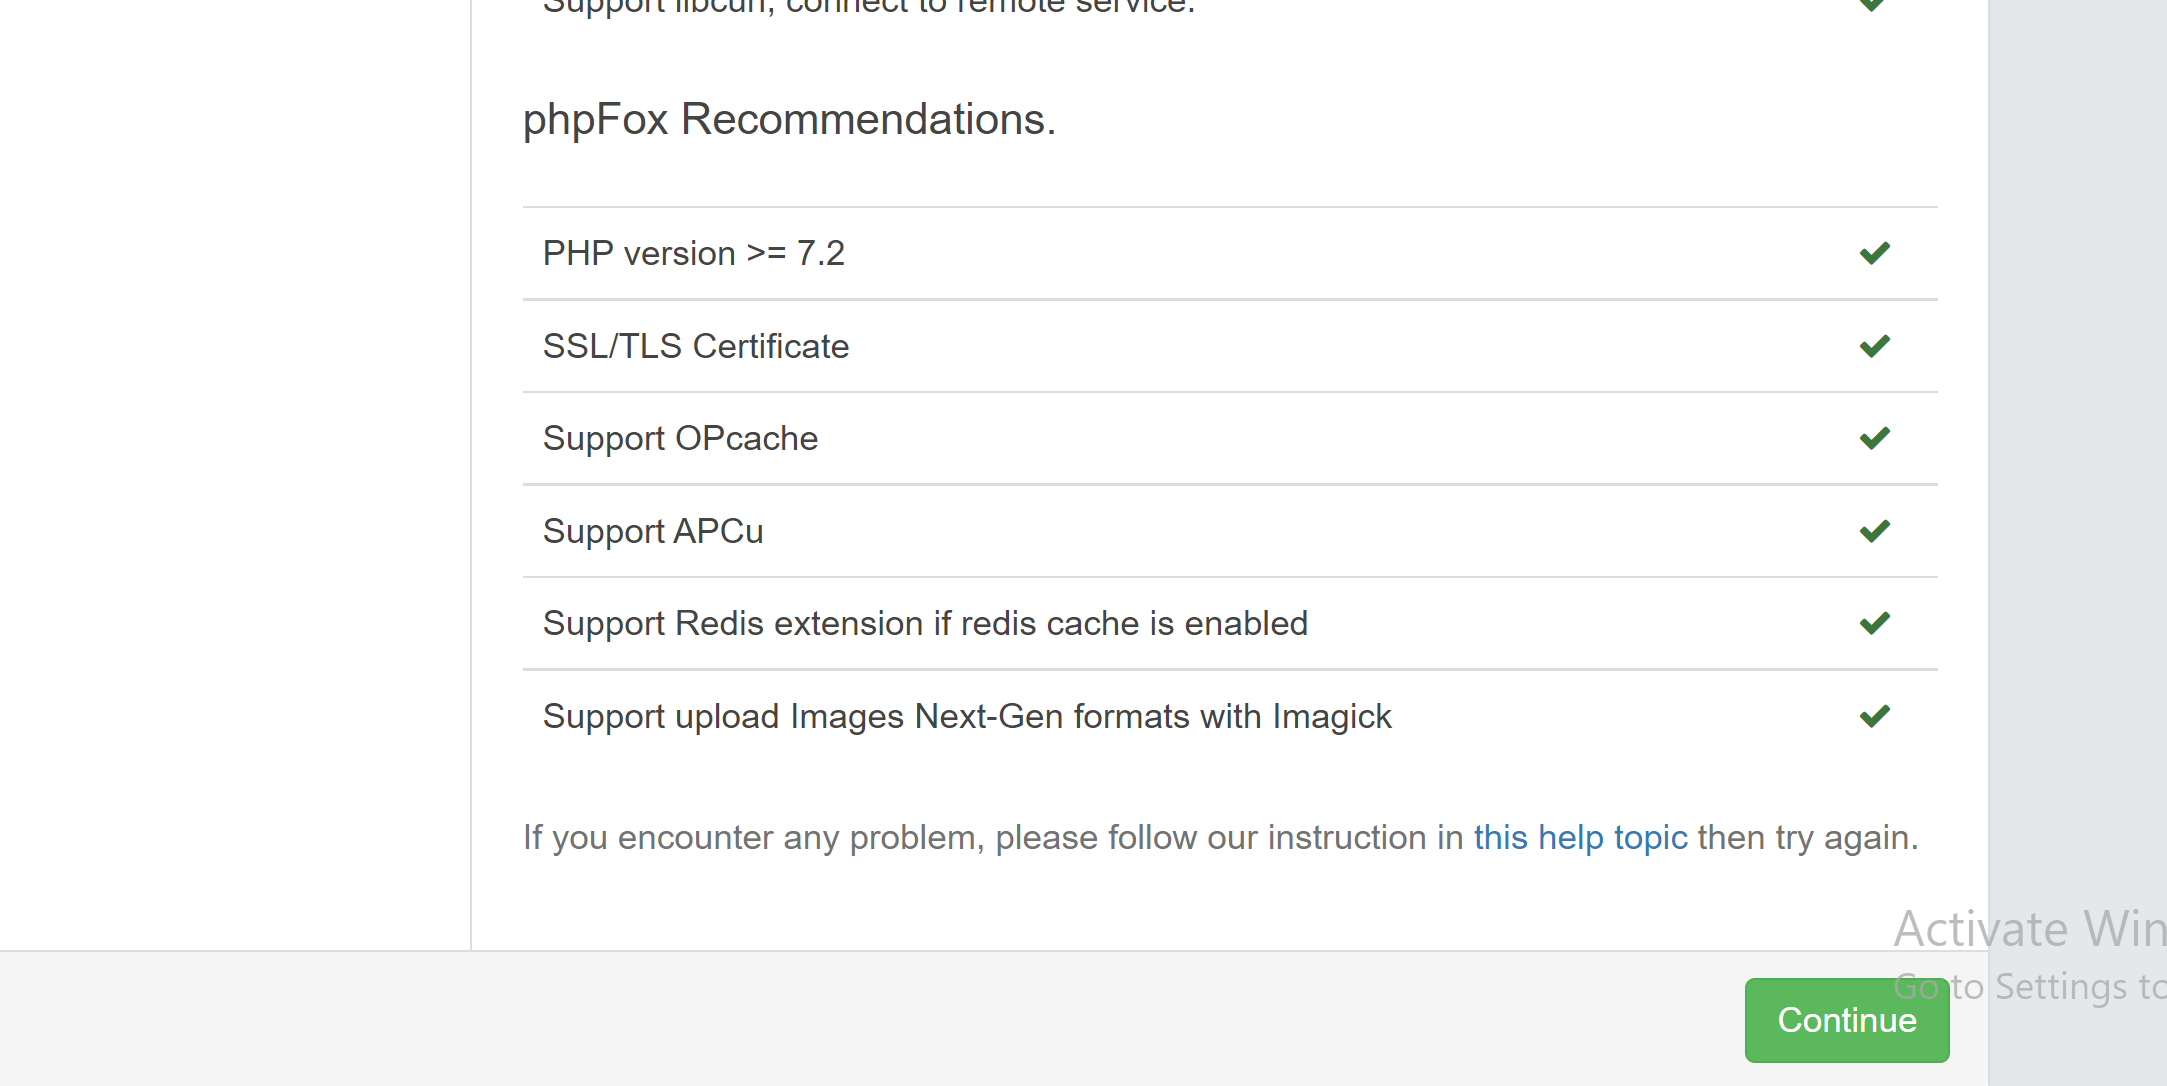
Check Requirements & Licenses.
The upgrade process will begin with a check for requirements. If all passed, click Continue to go up with the process.
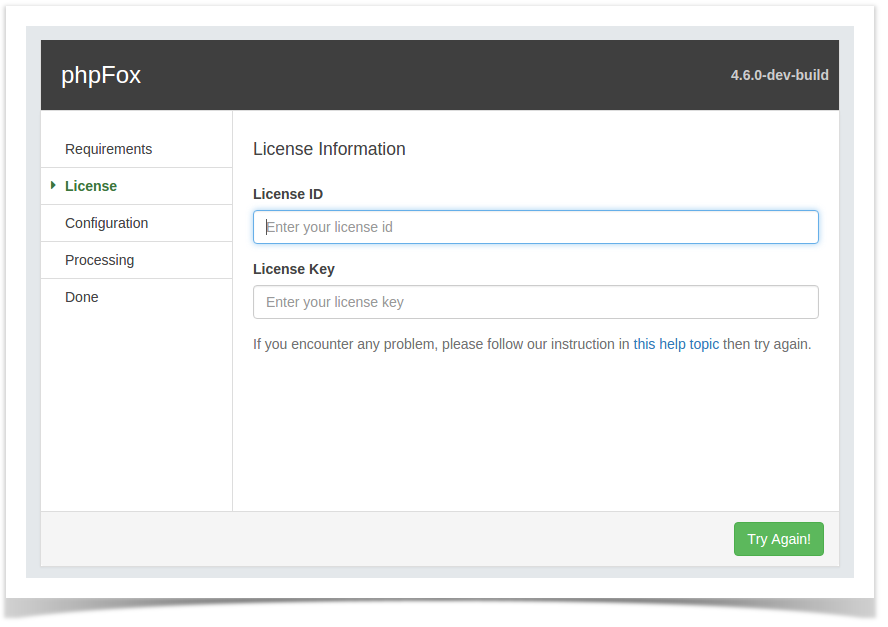
The next step will require you to re- enter your phpFox PHPfox License ID & Key. This is to prevent anyone from upgrading your site while it is offline.
, which was sent to you via an email directly after your purchase.
Select phpFox apps to upgrade
Then you will select phpFox apps that you want an upgrade on your site. (this step is required from version 4.5.3)
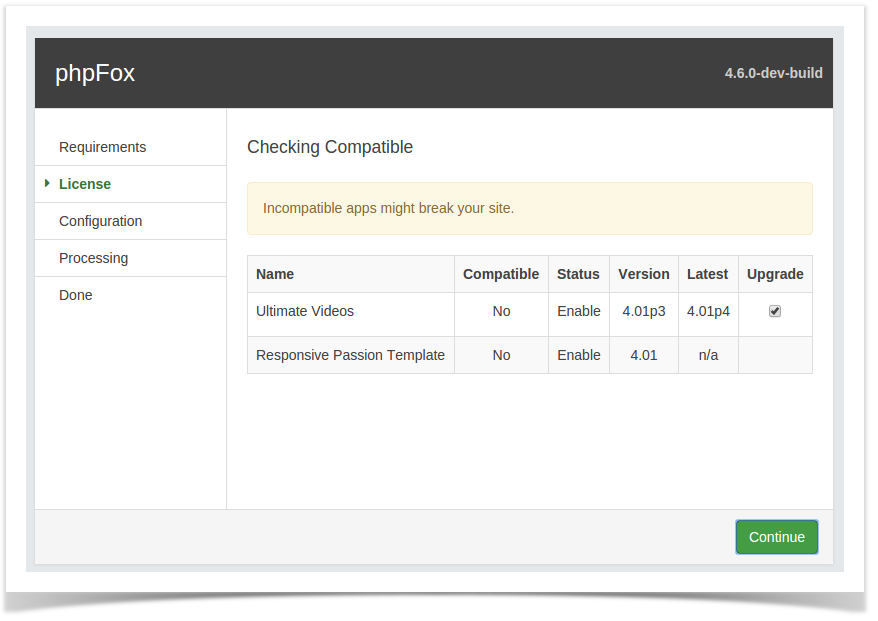
WARNING
The old apps will be replaced automatically, you should recheck the app configuration after upgrade process
Upgrade Process
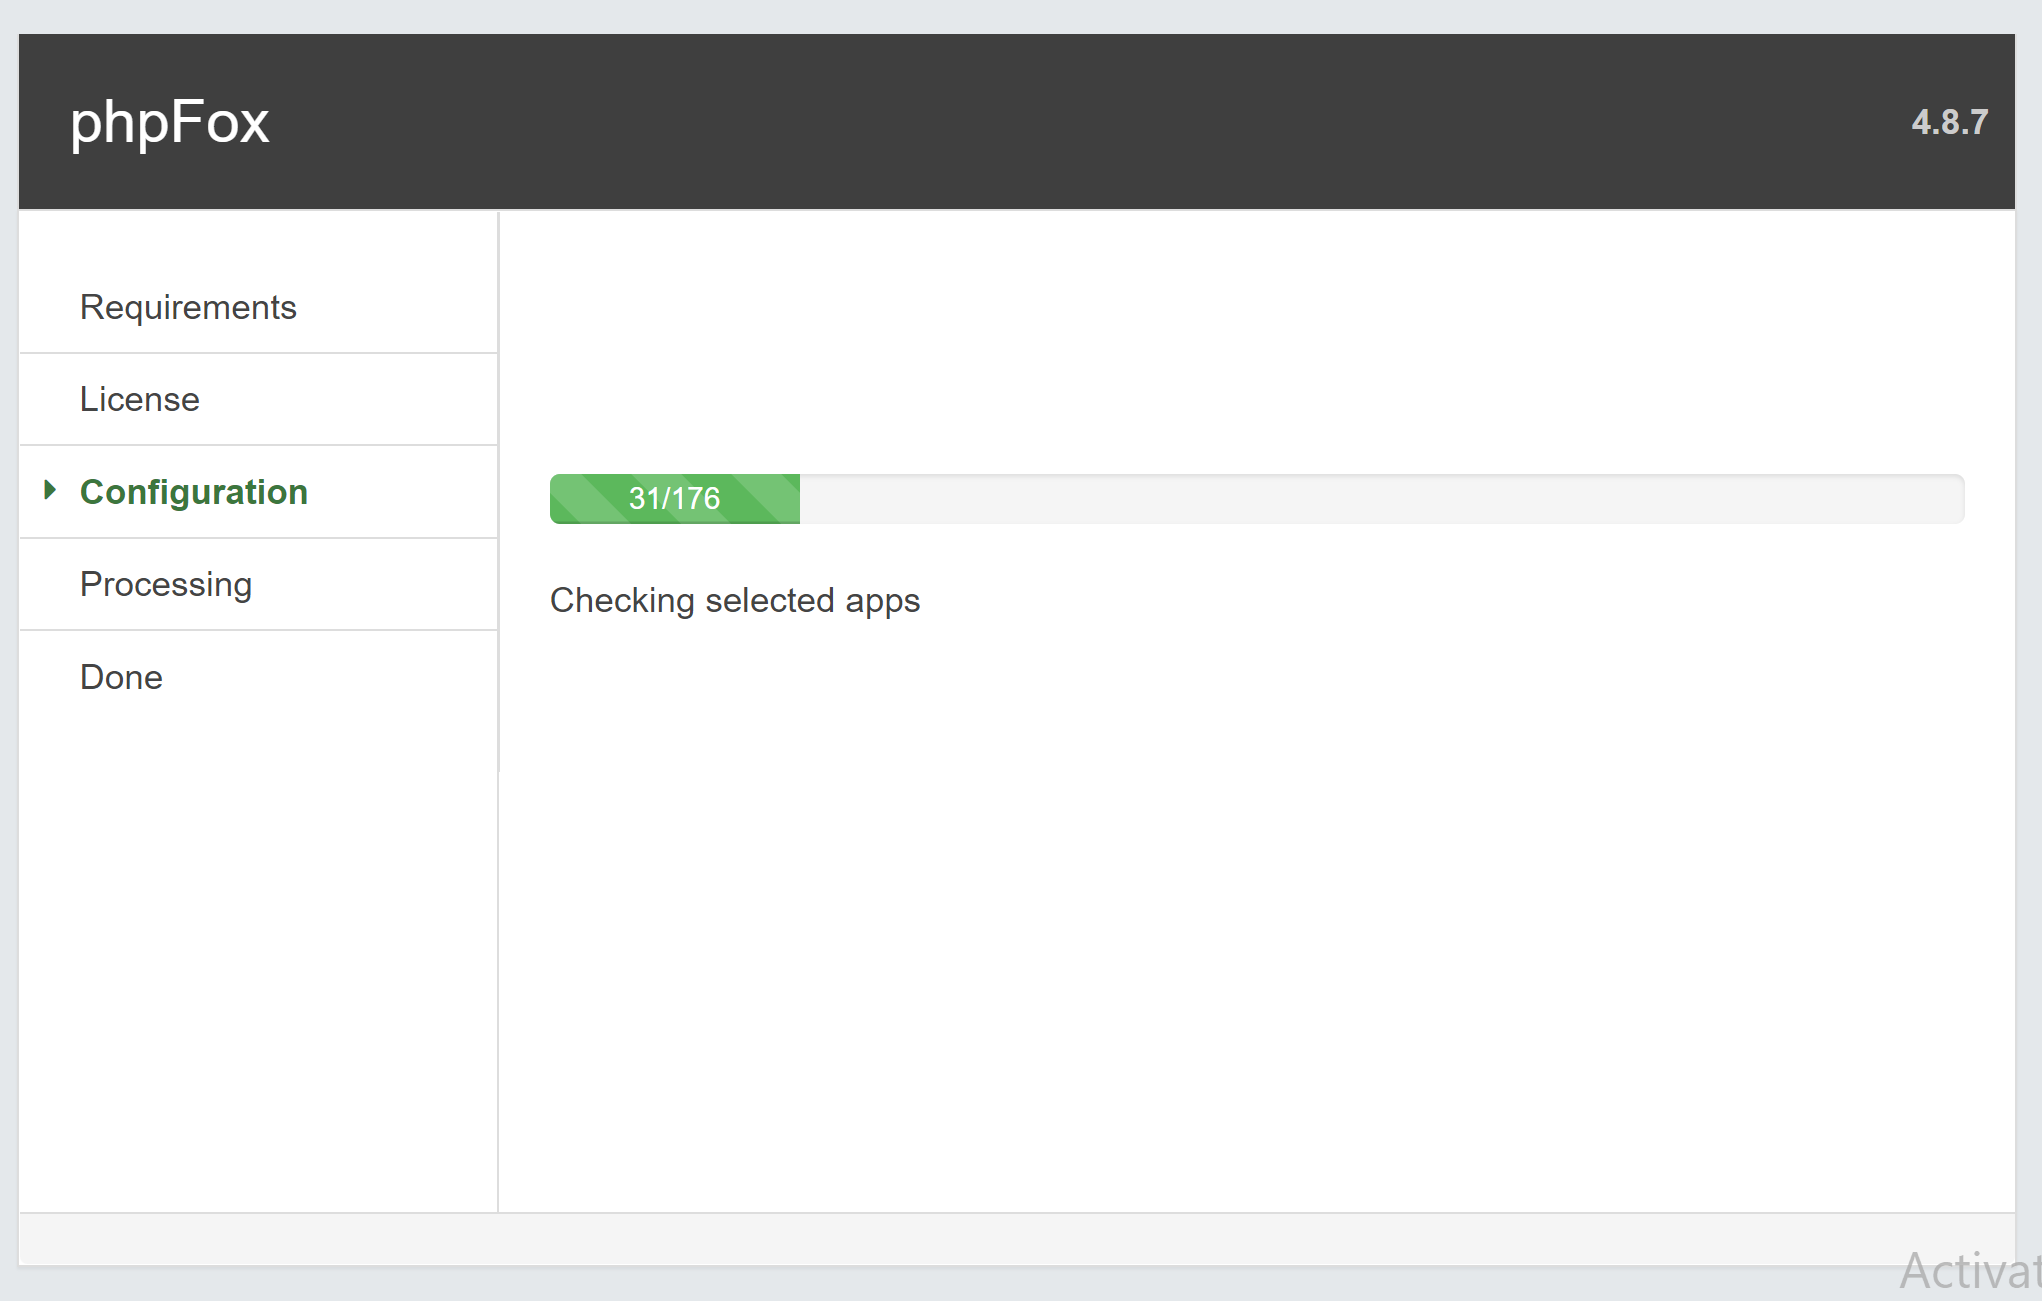
After you have successfully entered your phpFox License ID & Key the Upgrader will and selected phpFox apps to upgrade, the Upgrader will run all the required updates to your database until it is completed.
Notices
While upgrading to version 4.5.3 or later, you may face errors and most of those cases are caused by lack of write permissions on "PF.Site/Apps" folder when upgrading phpFox site with "File System" FTP option. In this case, we have some quick solutions for you:
- Solution 1: Update permission 777 to "PF.Site/Apps" folders and its subfolders/files recursively. Then you can follow our guidance to upgrade again and can use "File System" option
- Solution 2: Skip step to upgrading apps with phpFox by unchecking all apps. You can still use "File System" option.
- Solution 3: If you still want to upgrade apps while upgrading phpFox, please use "FTP/SFTP" option which FTP account has write permission on "PF.Site/Apps" folder
If you have faced any other issues or other solutions while upgrading phpFox, feel free to share us here.
Wait until the process finishes.
Set up Cron
Our version 4.4 and up requires a Cron to be set up phpFox Cron Setup . This is for several things that used to be done via the old phpFox cron. That process doesn't run now. In order to have the old messages deleted, group notifications, importing/converting old v4 groups to the new Groups app, and several other important tasks, you must set up the cron.
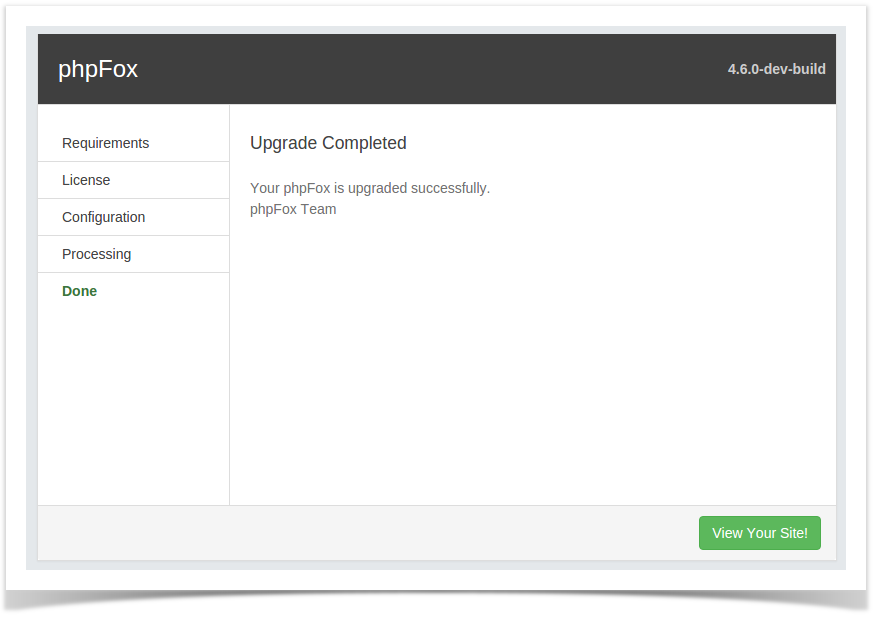
Finishing Up
Once you've logged into your site after upgrading, you'll need to do the following in order to bring in template fixes/changes, new phrases, and new settings.
- Run Rebuild Bootstrap Core routine.
Warning
This will delete any changes made to the default Bootstrap theme. Be sure you are never editing this theme. Always make a clone of it and edit that instead as this routine must be run on each upgrade.
- Go to Themes and select Bootstrap and click to Edit it.
- On the left menu, at the bottom, click to see the options and select Rebuild Bootstrap Core.
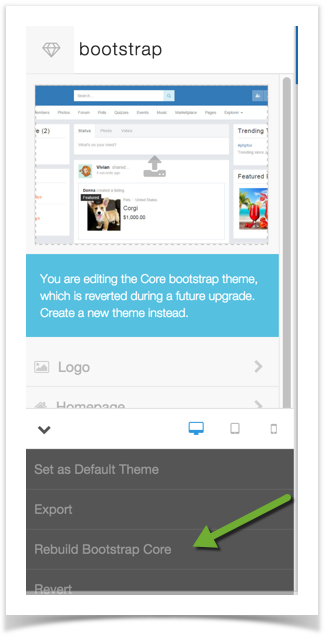
- If you are not using Bootstrap as the default theme, you might not see the Rebuild Bootstrap core in the Bootstrap theme as it will show up in the theme that you have set as the Default theme so click your default theme and you will see it there.
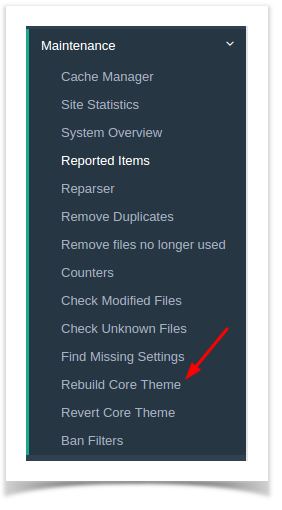
- Alternately, you can also find the Rebuild Core Theme in Maintenance >> Rebuild Core Theme. This will do the same thing as above. You can do either method.
| Warning |
|---|
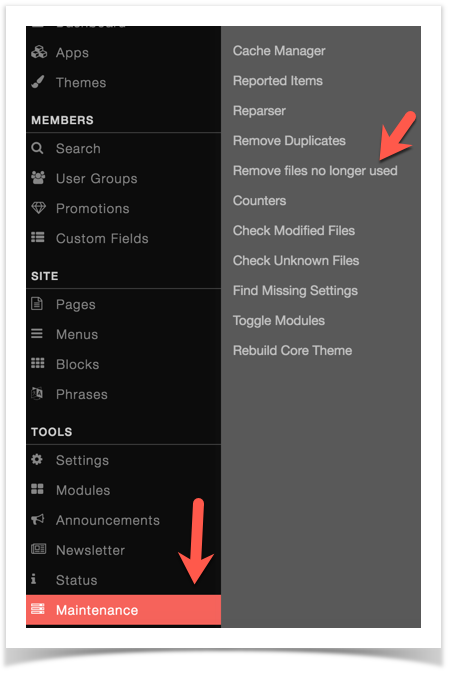
| If upgrading to v4.4 or higher, run the Remove Files No Longer Used (seen below) before doing the Missing Settings and Missing Phrases steps. |
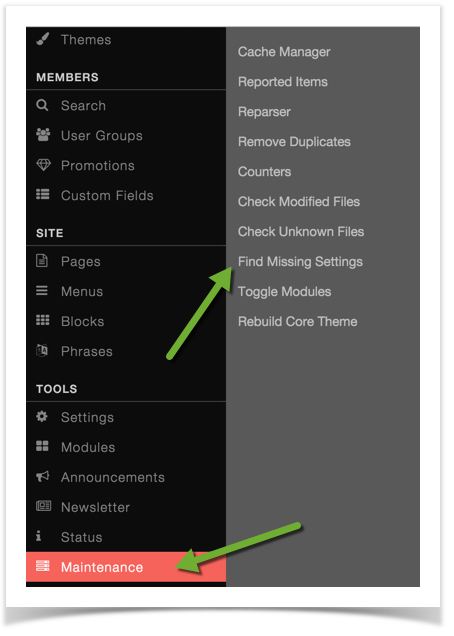
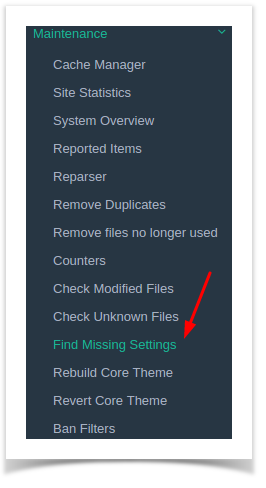
- Run Find Missing Settings in AdminCP >> Maintenance.
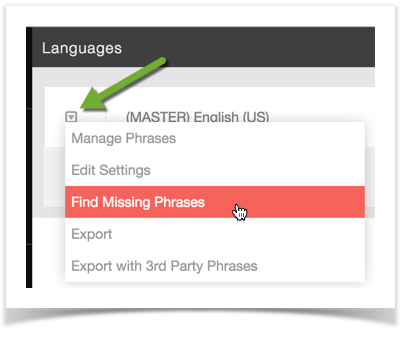
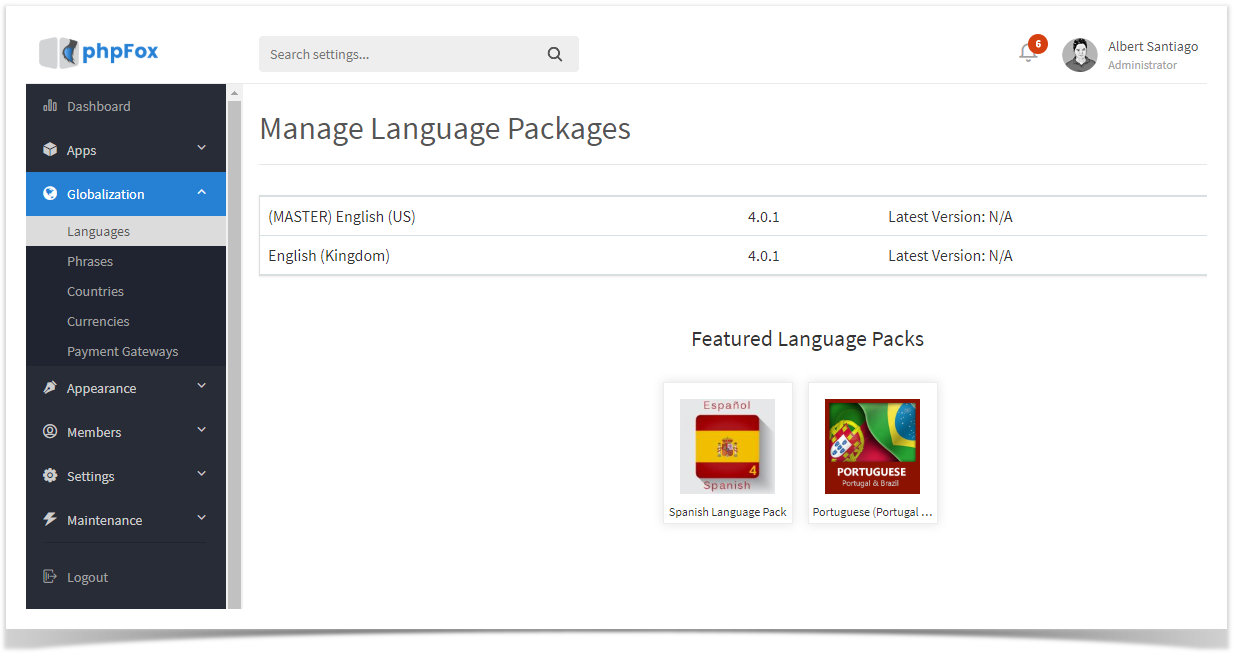
- Run Find Missing Phrases in AdminCP >> Language and click to the left of the default English language to run this.
| Note |
|---|
| Next Step is or V4.4 and up ONLY. |
- Now go to AdminCP >> Maintenance >> Remove Files No Longer Used
...
- Select Rebuild Core Theme from Maintenance menu.
- Remove Files No Longer Used
- Select Remove Files No Longer Used from Maintenance menu.
- You will have options to choose from for this. You can manually do them, use FTP, or use SSH:
...
- Once you select a method, if FTP or SSH, be sure to click Check Permission and Remove Files. It will then run the process and remove the old files for you.

...
| Info |
|---|
|
- Run Find Missing Settings.
- Run Find Missing Phrases: Choose Languages from Globalization menu. Click on to arrow next to the language you are using and choose Find Missing Phrases.
Remove Installation Log
In order to prevent security risks, this step needs to be proceeded right after the installation is completed without any problem. Please go to folder /PF.Base/file/log/and remove the installation.log file there.