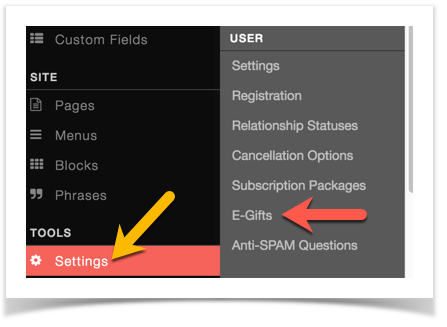
This assumes you are already logged in with the Admin user and are logged into the AdminCP .
- Click Settings >> E-Gifts to get to the E-Gift management screen.
Adding and Managing Categories
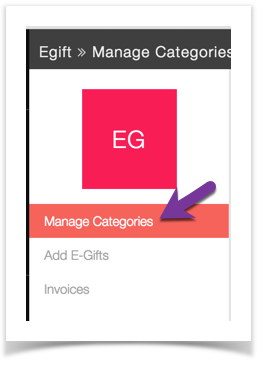
Once you are in the E-Gift area, you can add and manage your categories. You need to set up your categories that you want so you can add E-Gifts.
- Click Manage Categories
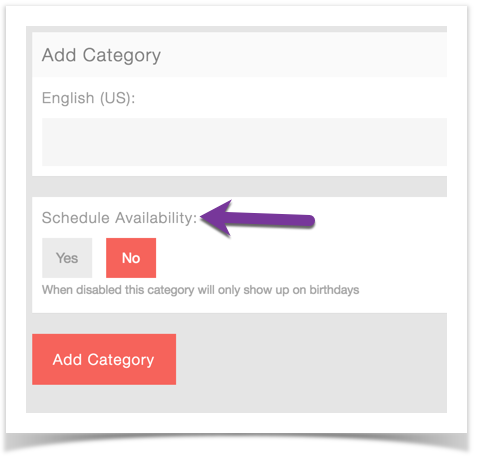
Adding Categories
- Fill in the fields to the right of the screen if you want to add a category.
- For Gifts that just show on the user's friends birthday, keep the Schedule Availability set at No.
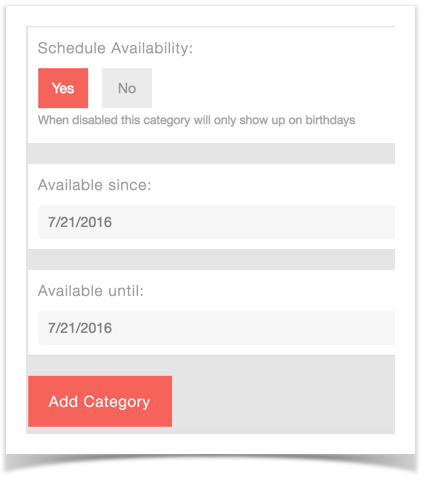
- For Gifts that show all year long, set the Availability at Yes and choose your dates.
Managing Categories
- Click to the left of your categories to drag them up or down to sort them.
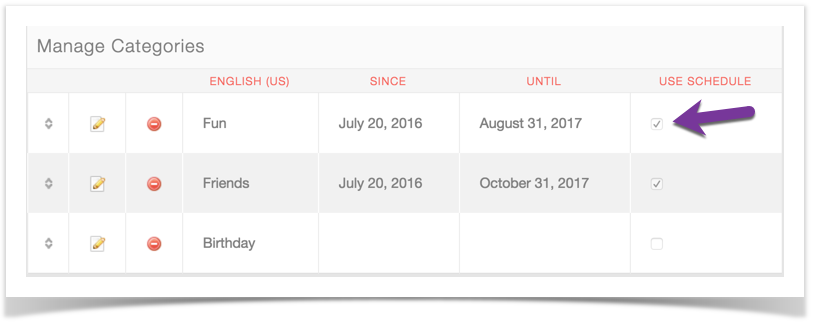
- Click the pencil and paper icon to edit the category name or dates.
- Click the minus sign to delete this category and the egifts that are in it.
- Click the Use Schedule checkbox to enable or disable this from showing all year long. Disabled will show only on the birthday of the user's friends.