This tutorial will show you how to change settings for a user group for your website. This assumes you are already logged in as the Admin user and are logged into the AdminCP.
You can view our video tutorial or see the written tutorial below it.
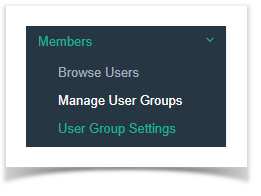
- Go to Members and Select User Group Settings.
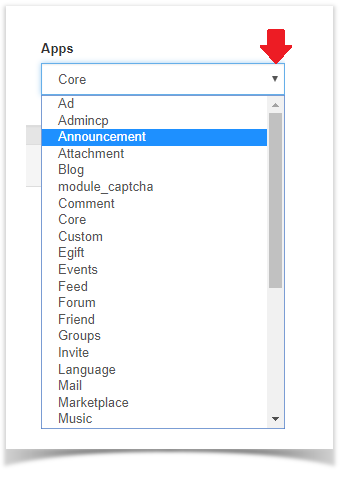
- Click the drop-down arrow to select the app you want to change the settings for.
- Click the drop-down arrow to select the group you want to apply the changes in the settings for.
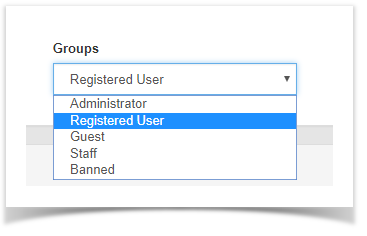
- Once the specific app and group are selected(we chose Announcement and Registered User as an example). you'll see a list of all of the settings available to your this app in this specific user group. We also have to debug enabled so your view won't look exactly like this one. Select YES to Enable and NO to Disable.

- Click SAVE CHANGES when done.
Settings are done per user group so you'll want to make sure to set up each user group how you want them.
Be cautious of what you change for the Administrator user group as some settings can lock you out of the site but they have a warning at them so please read all descriptions before changing Administrator user group settings.